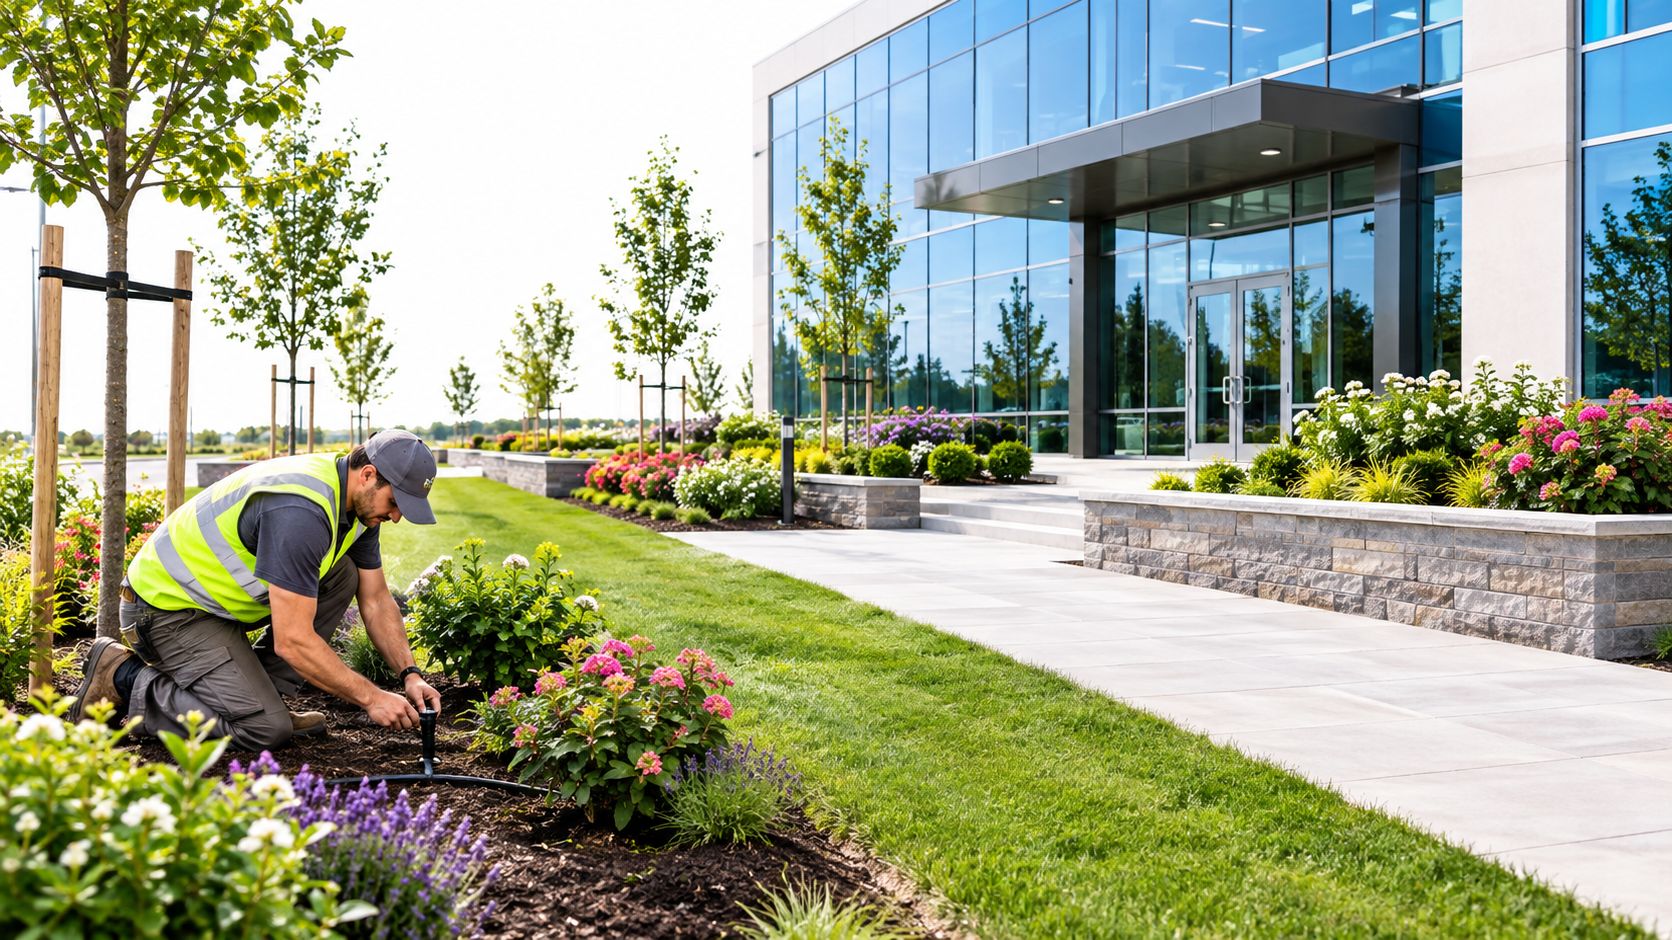
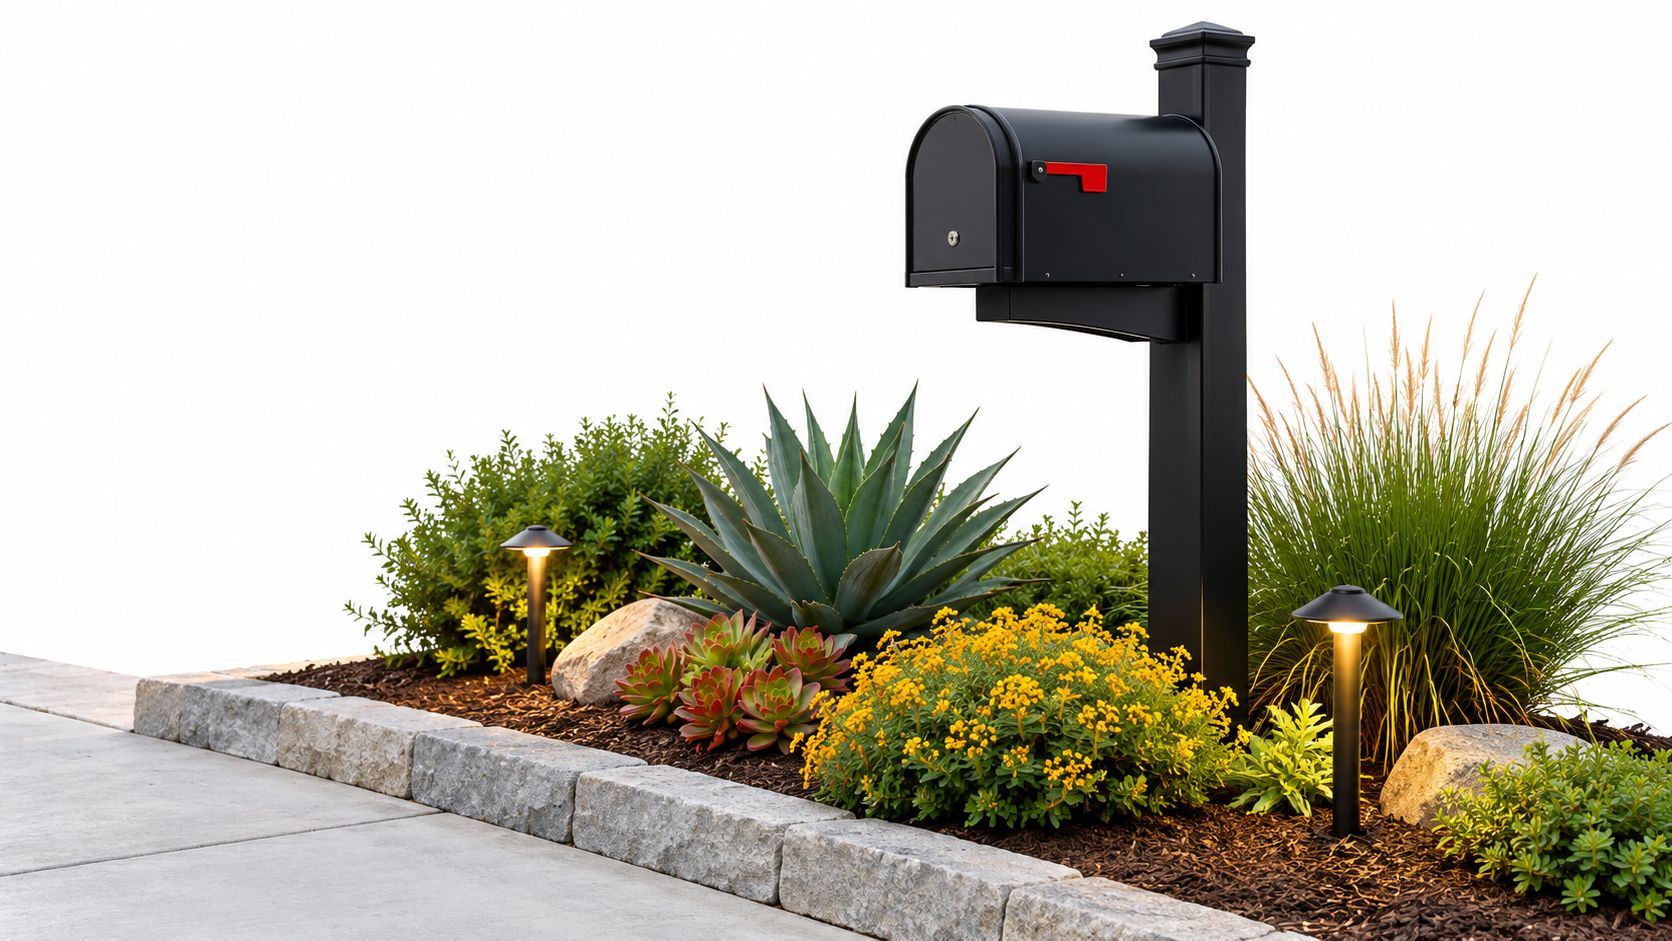
A property manager usually notices the mailbox zone only when something goes wrong. The carrier can't reach the box cleanly. A shrub starts catching mirrors. Mulch washes into the curb after a hard rain. Residents add seasonal decor that turns a simple delivery point into visual clutter.
That's the wrong time to think about it.
In high-traffic properties, the mailbox area works like a small arrival system. It sits at street level, it gets judged before the lobby does, and it has to perform every day without creating delivery problems, mowing headaches, or safety issues. Good curb appeal mailbox landscaping isn't a flower bed first. It's a clearance-first, maintenance-smart piece of site infrastructure that also happens to improve how the property looks from the road.
Table of Contents
- Why Your Mailbox Zone Shapes First Impressions
- Assessing Your Mailbox Site for Safety and Access
- Designing Low Maintenance High Impact Mailbox Beds
- Installation Best Practices That Prevent Callbacks
- Irrigation Drainage and Seasonal Care Schedules
- Keeping Mailbox Landscaping Compliant Cost Effective and Worry Free
Why Your Mailbox Zone Shapes First Impressions
A prospect slows at the curb, looks for the address, and gets an answer about the property before reaching the entry. If the mailbox is straight, readable, and clean around the base, the site feels managed. If the post leans, the numbers disappear into overgrowth, or the area looks pieced together, that impression lands first.
Research in the Journal of Environmental Horticulture ties stronger curb appeal to higher residential value, including a reported 2.2% price increase for each one-unit improvement in curb appeal and 31% of price variation explained by curb appeal after controlling for other factors (Journal of Environmental Horticulture). For HOAs and commercial properties, the practical point is simpler. Street-facing details shape perceived quality fast.

The mailbox is part of the arrival sequence
On site walks, I treat the mailbox area like a small arrival control point. It has to support delivery, preserve sightlines, stay readable from a moving vehicle, and hold up under mowing and edging. Appearance matters, but performance comes first.
The best-looking mailbox zones usually do three things well:
- Read clearly from the street: The post, box, and address numbers are easy to identify without visual clutter around them.
- Stay out of the work path: Crews can trim and mow around the base without scalping turf, throwing mulch, or hitting hard edging.
- Match the frontage materials: The finish, color, and base treatment fit the rest of the property instead of looking like a homeowner add-on.
If you are reviewing the full street view, this guide on improving curb appeal from the road is a useful reference. And if the box itself is outdated, it often makes sense to boost curb appeal with a custom mailbox before spending money around a damaged unit.
Practical rule: Fix the box, post, and address visibility before adding any bed treatment.
Small footprint, strong signal
This area gets more attention than its size suggests. Cars slow near it. Delivery drivers judge access there. Residents pass it every day.
That is why successful curb appeal mailbox planting starts with clearance, durability, and maintenance time. A mailbox zone should work like site infrastructure with a finished appearance, not a decorative pocket that creates trimming problems and service conflicts.
Assessing Your Mailbox Site for Safety and Access
A mailbox can look clean from the street and still fail in use. I see it happen when a nice-looking bed forces the carrier to reach, blocks a driveway sightline, or gives mowing crews no safe path around the post.
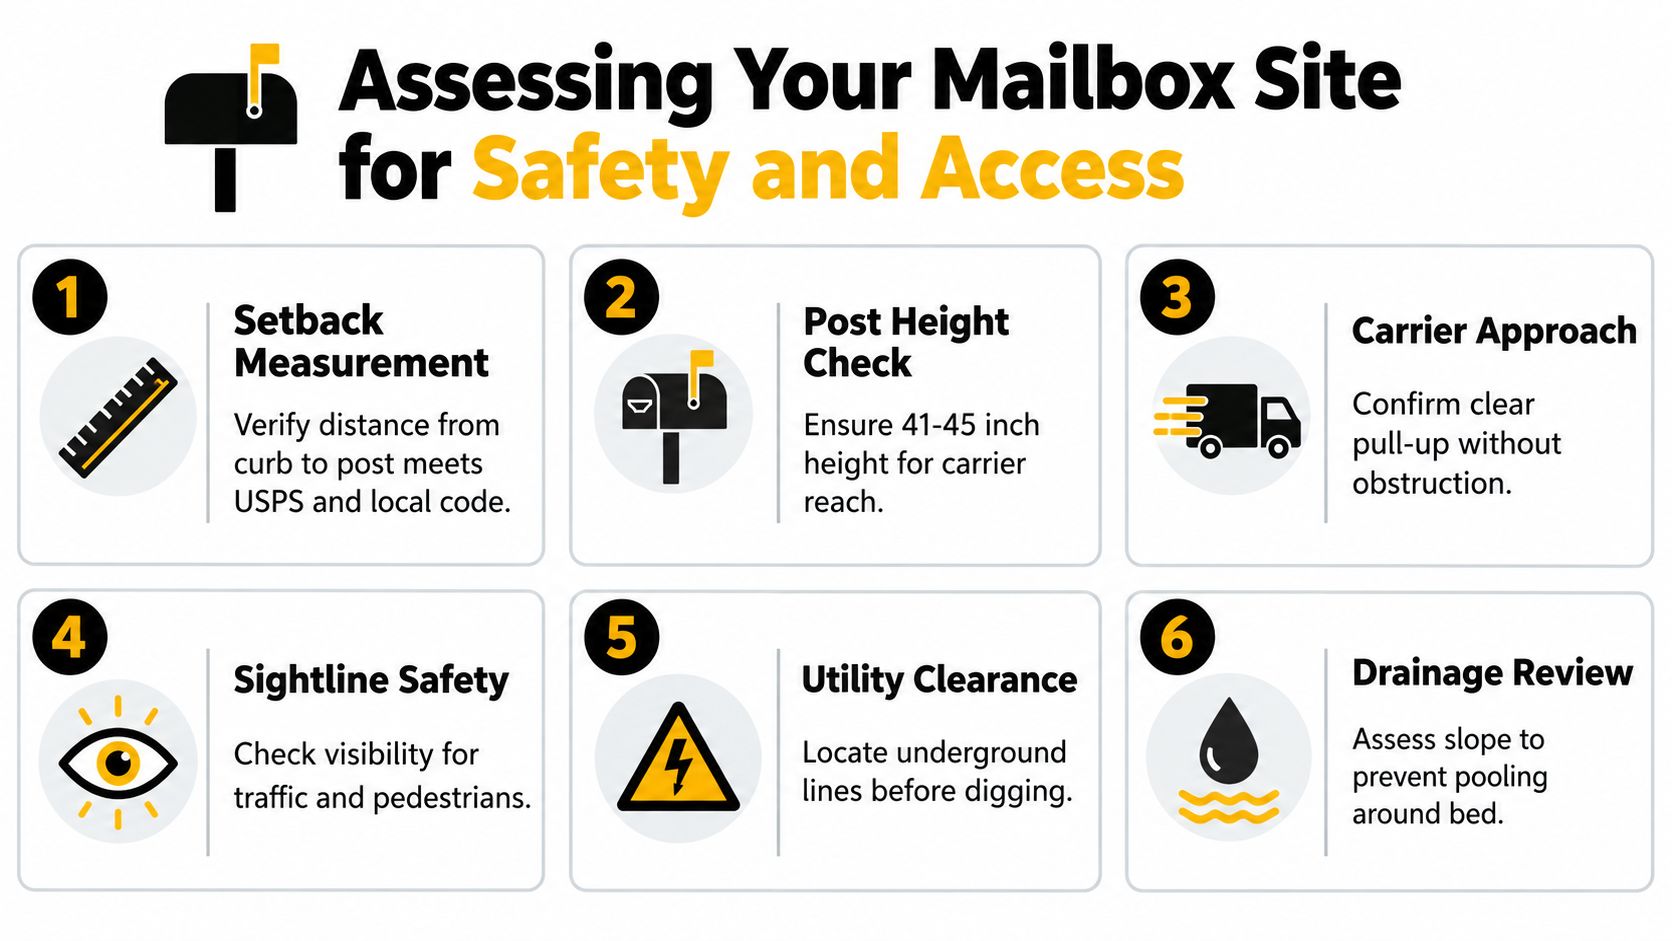
Start with the operating clearances. For curbside installations, USPS-aligned local standards commonly call for the mailbox bottom to sit about 41 to 45 inches above the road surface and the box face to sit roughly 6 to 12 inches back from the curb or shoulder. The approach also needs to stay clear of obstructions and visibility hazards so delivery can happen without crowding the traveled lane, as outlined in mailbox standards guidance.
Treat the mailbox area like a small arrival system. Delivery clearance, driver sightlines, door swing, mower access, and runoff patterns all matter before any bed line gets marked.
What to check on the first site walk
Bring a tape measure, marking paint, a camera, and a simple field sheet. Field guesses create callbacks.
Use this checklist:
- Confirm post height and setback. Measure from road surface to mailbox bottom, then from the curb or shoulder to the box face.
- Map the carrier window. Stand where the delivery vehicle stops and check reach distance, door swing, and box access.
- Check traffic sightlines. Review views from the driveway, the street approach, and any nearby intersection or curve. Low plantings can work. Taller material near conflict points usually does not.
- Read the maintenance pattern. Note where mowers turn, where trimmers hit the base, and where snow, gravel, or street debris gets pushed.
- Evaluate soil and drainage. These sites often sit in compacted fill and catch runoff off pavement, which limits plant choices and shortens bed life.
- Document utilities and hard constraints. Mark irrigation, request utility locates before digging, and note curb cuts, concrete edges, guard features, and sign posts.
Hidden conditions that create rework
The usual failure is geometry, not style. A bed can fit on install day and still become a problem after one growing season.
Ornamental grasses flop into the door path. Seasonal color hides the address. A shrub forces the carrier to stop off-position. Then the property manager pays twice. First for installation, then for pruning, transplanting, or removal.
Keep the box opening clear. Preserve visibility at driveways and curb approaches. Avoid thorny or stiff material near the service side.
That matches the practical points in YardCast's review of mailbox planting ideas and right-of-way practicality, especially the emphasis on low-growing, non-thorny material that does not interfere with delivery.
Site notes that speed approvals
HOA and community approvals move faster when the review package shows operating clearance, not just appearance.
Include:
- A roadway photo: Take it from the actual driver approach, not straight-on from the lawn.
- A marked sketch: Show curb, post, clear zone, driveway edge, and proposed bed line.
- A maintenance note: Identify who mows, who prunes, and where debris gets staged or removed.
- A lighting note: If the address is hard to read at dusk, flag it for a coordinated fix. Prestonwood's exterior lighting design ideas for frontages and entries are a useful reference when visibility problems extend beyond the mailbox itself.
If the site fails the access check, reduce the bed, shift the layout, or stay with hardscape and mulch only. That choice usually holds up better than forcing plants into a bad service zone.
Designing Low Maintenance High Impact Mailbox Beds
Once the site clears the access test, design gets easier. The best mailbox beds on commercial and HOA properties are compact, deliberate, and restrained. They don't try to act like a cottage border. They read cleanly from the curb and hold their shape between service visits.
That usually means a simple bed geometry, durable edging, a controlled plant palette, and enough negative space that the box and numbers stay dominant.
Bed shape and materials that stay sharp
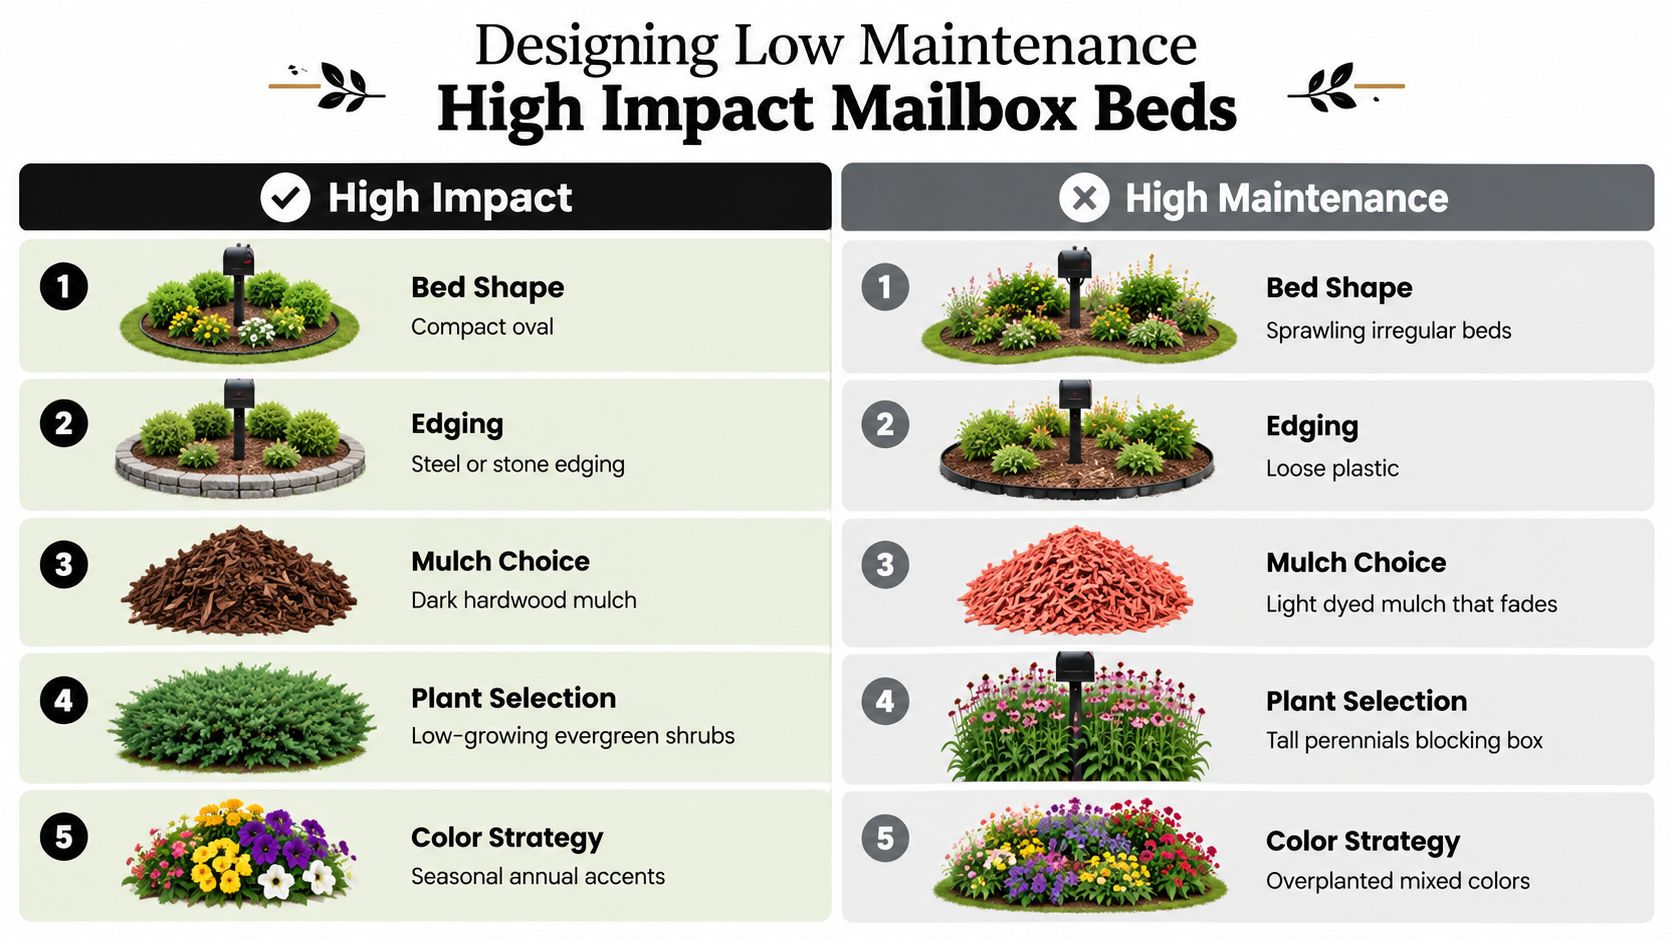
Small beds fail when the outline gets fussy. Irregular curves may look interesting on paper, but they usually create string-trimming wear, ragged mulch edges, and more labor every visit.
What lasts better:
- Compact oval beds: Easy to mow around and easy to refresh.
- Tight rectangles with softened corners: Good fit for modern or formal frontages.
- Steel or masonry edging: Holds line better than lightweight plastic in high-traffic sites.
- Dark, natural-looking mulch: Hides minor disturbance and frames the post well.
What usually underperforms:
- Sprawling organic shapes: Too much edge for too little visual payoff.
- Loose rock without restraint: Migrates into turf and curb lines.
- Tall decorative rings or stacked features: They can interfere with service and make repairs harder.
Planting strategy for commercial conditions
The mailbox bed should be planted like a visibility feature, not a collector's garden. Use low-growing, non-obstructive plants with predictable form. Favor foliage and structure over constant bloom demand.
A good commercial palette typically leans on:
- Low evergreen massing: Useful when you need year-round shape.
- Compact perennials: Better than tall, floppy bloomers that collapse into the clear zone.
- Seasonal accents in limited quantity: Enough to freshen the look without turning the bed into a rotation-heavy display.
- Non-thorny material: Safer near the box opening and easier for crews to maintain.
If you're building a perennial-heavy scheme, Prestonwood's list of low-maintenance perennial plants is a practical starting point for species that don't demand constant correction.
The strongest mailbox beds are usually the simplest ones on the property. Fewer plant types. Less spread. Better visibility.
Mailbox Bed Options Compared for Commercial Durability
| Option | Maintenance Level | Visual Impact | Best Use Case |
|---|---|---|---|
| Low evergreen ring with mulch | Low | Clean and consistent | HOAs, office parks, entries with year-round expectations |
| Mixed perennial bed | Moderate | Softer, more colorful | Properties with regular horticultural service |
| Seasonal color-focused bed | High | Strong short-term pop | Hospitality or showcase frontage with active rotation budget |
| Stone or steel-edged minimalist bed | Low | Crisp, architectural | Modern campuses, retail, contemporary multifamily |
| Decorative overplanted bed | High | Busy at first, declines fast | Rarely worth it in high-traffic settings |
Visibility and security belong in the design
Address legibility matters as much as plant selection. Jurisdictions that regulate mailbox presentation often require the address number to be at least 3 inches high, in a contrasting color, and visible from both sides, and some also prohibit mailbox lighting except for limited downlighting of the numbers (Lakeway design manual). That pushes the design toward contrast, restraint, and clear face visibility.
This is also where security-minded site planning helps. If the mailbox sits near community access points, entry drives, or shared resident circulation, it's worth reviewing how sightlines, lighting, and visual openness support safer use. Overton Security's overview of how to apply CPTED principles in 2026 is a useful planning reference for that broader layer.
The design test is simple. If the bed makes the address harder to read, creates glare, or gives crews more to damage, it's overdesigned.
Installation Best Practices That Prevent Callbacks
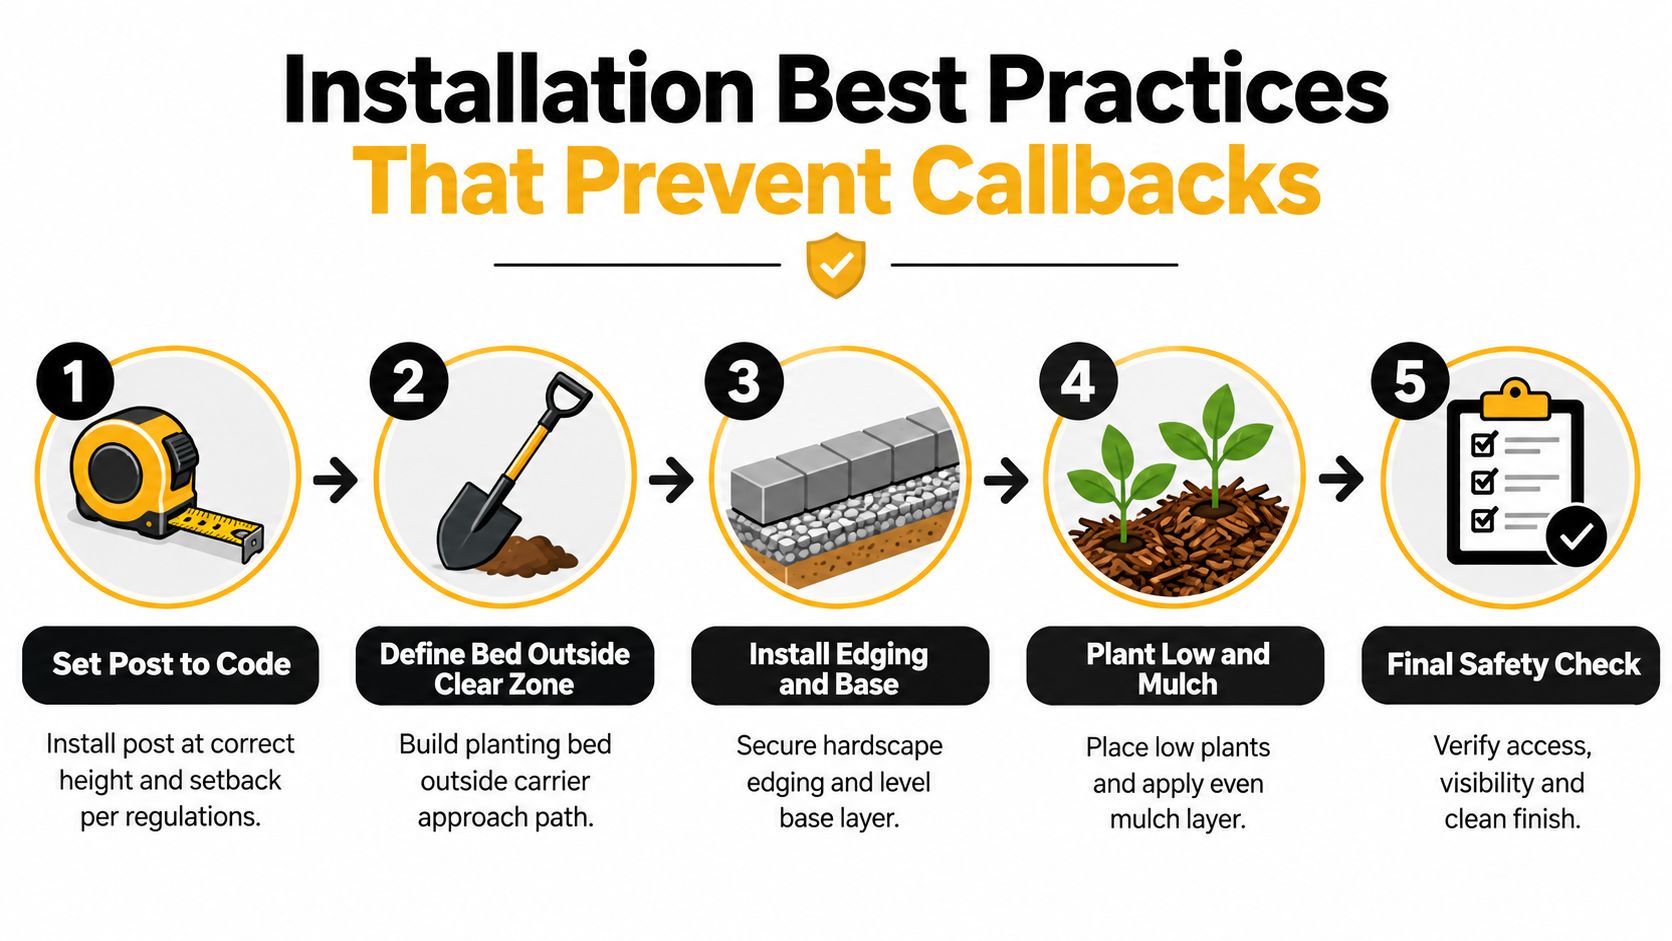
Most mailbox landscaping callbacks come from sequencing mistakes, not plant choice. A crew rushes the bed layout before the post is confirmed. Edging cuts into the carrier envelope. Soil gets built too high around the post. Then the installation looks finished but starts generating complaints almost immediately.
A clean build starts with layout control and ends with a safety walk.
Field sequence that works
Use a simple build order and don't let crews improvise around the mailbox post.
- Set the mailbox first. Confirm final height, setback, and orientation before any bed outline is cut.
- Mark the no-build zone. Paint the carrier approach envelope and keep all edging, stone, and plant mass outside it.
- Cut the bed and establish grade. Keep finished grade stable and avoid creating a bowl that traps runoff against the post.
- Install edging and base materials. Lock the shape in before planting so the bed line doesn't creep.
- Plant to mature size, not nursery size. Small plants tempt crews to tuck them too close.
- Mulch lightly and evenly. Keep mulch off the post and out of the box approach.
- Finish with visibility checks. View the box from both travel directions and from the stopped delivery position.
Common installation errors
These are the mistakes that generate avoidable service calls:
- Planting for today's size: Compact material at install can still outgrow the clear zone quickly.
- Overbuilding the bed edge: Raised stone, decorative collars, or bulky features create impact points for mowers and vehicles.
- Ignoring drainage flow: Curbside water can strip mulch and expose roots if the bed isn't shaped properly.
- Blocking the address face: Crews often center plants around the post without testing actual sightlines.
- Skipping the final approach test: If no one checks from a vehicle position, access problems get missed.
Crew note: The mailbox has to work the day the install finishes. Don't hand maintenance a correction project.
Working in active frontage areas
Mailbox work often happens in the right-of-way or in spaces that still need to function during installation. Keep staging tight. Don't leave spoil piles where they narrow the shoulder or block resident access. If irrigation or lighting adjustments are included, coordinate trades so the bed isn't reopened later.
This is also the point where a manager may decide whether to self-coordinate crews or hand the installation to a contractor that handles both construction and ongoing care. Prestonwood Commercial Landscape Services is one example of a provider that performs construction, planting, irrigation-related work, and maintenance under one operating system, which can reduce handoff issues on managed sites.
Irrigation Drainage and Seasonal Care Schedules
A mailbox bed usually fails slowly. Not because the design was terrible, but because nobody built a realistic care pattern around a very small space. Tiny beds are easy to overlook, and that's exactly why they become weedy, overwatered, or overgrown.
The fix is to treat the area like a repeating maintenance task with a short checklist.
Irrigation that fits the footprint
Spray heads are often a poor match for mailbox beds. They throw water onto pavement, wet the post, and encourage shallow rooting. In most small installations, drip irrigation or a tightly controlled low-volume zone is easier to manage because water goes where the root zone is.
Check these points during every irrigation review:
- Emitter placement: Water the plant mass, not the curb.
- Overspray: If pavement stays wet after a cycle, the application method is wrong or poorly aimed.
- Runoff pattern: Watch where water moves after rain and after irrigation.
- Controller coordination: Small beds shouldn't inherit the schedule of nearby turf if their needs are different.
Drainage and bed stability
Mailbox sites sit where hard surfaces shed water. That means even a good-looking bed can wash out if the grade is wrong.
Look for these warning signs:
- Mulch migration into the curb line
- Soil settling around the post
- Pooled water after storms
- Exposed roots near the pavement edge
If the bed repeatedly moves during rain events, the answer usually isn't more mulch. It's reshaping the grade, tightening the edge restraint, or reducing the bed area so runoff has less loose material to carry.
A practical yearly care rhythm
The best seasonal schedule is simple enough that crews will follow it.
- Late winter: Prune back anything drifting toward the box face or number zone. Reset bed edge if needed.
- Spring: Refresh mulch, inspect irrigation, replace dead material, and confirm address visibility.
- Early summer: Watch for heat stress, emitter clogs, and rapid seasonal growth into the service envelope.
- Late summer: Reduce tired seasonal color rather than forcing it through decline.
- Fall: Clean up debris, recheck edging, and prepare for leaf buildup around the curb.
- Winter events: Keep snow removal, plow paths, and curbside debris from piling into the box and bed area where applicable.
For multi-site portfolios, central water management and recurring inspection photos help keep standards consistent. The key isn't complexity. It's making sure someone owns the bed all year instead of only during install season.
Keeping Mailbox Landscaping Compliant Cost Effective and Worry Free
The mailbox zone gets easier to manage when you stop treating it like a decorative exception. It's part of the frontage system, and it should be reviewed the same way you review signage, lighting, pavement edge, and entry planting.
That shifts the decision-making in a useful way.
What boards and managers should approve
Approve mailbox improvements only if they meet all three tests:
- They preserve compliance and access: Delivery clearance, sightlines, number visibility, and maintenance reach stay intact.
- They reduce lifecycle friction: Crews can mow around them, prune them quickly, and repair them without tearing out the whole feature.
- They fit the property standard: Materials, color, and scale match the rest of the entry experience.
When one of those breaks, the mailbox bed turns into a repeating budget nuisance.
Where overdesign usually shows up
The most expensive mailbox landscaping isn't always the most elaborate on day one. It's the scheme that forces constant touch-up. Dense plantings, decorative structures, and novelty lighting often create more service calls than visual value.
That same thinking shows up in other community access features. For example, when HOAs review entry operations, they usually want systems that stay legible, easy to manage, and simple for residents to use. The same mindset applies if your board is already evaluating tools like an HOA gate access system alongside frontage upgrades.
Keep the mailbox area readable, open, and easy to maintain. That's what holds up in the field.
A short decision checklist
Before approving work, ask:
- Does the mailbox location support planting without affecting service?
- Are the numbers easy to read from both directions?
- Can mowing and trimming happen without handwork every visit?
- Will the bed still function after growth, storms, and seasonal debris?
- Is one vendor or team clearly responsible for upkeep and correction?
If the answer to any of those is no, revise the plan before installation. That's how you keep curb appeal mailbox landscaping from becoming a small but persistent headache.
Prestonwood Commercial helps property managers and HOAs plan, install, and maintain frontage plantings that stay clean, compliant, and easy to service, including the small high-visibility zones that shape first impressions. If your mailbox area needs a clearer layout, better plant selection, or a maintenance plan that holds up, visit Prestonwood Commercial Landscape Services to see how their teams support commercial sites across Texas.