
A disciplined approach to landscape lighting maintenance saves money and prevents downtime. Routine upkeep costs a fraction of full replacement and catches small faults before they cascade into major outages.
Table of Contents
- Why Landscape Lighting Maintenance Pays For Itself
- Building a Routine Inspection Schedule That Actually Works
- Catching Electrical Failures Before They Cascade
- Seasonal and Storm-Season Adjustments Your Crew Should Plan For
- Budgeting, Staffing, and Knowing When to Call a Pro
- Frequently Asked Questions About Landscape Lighting Maintenance
Why Landscape Lighting Maintenance Pays For Itself
Proper maintenance reduces emergency calls, protects capital, and keeps curb appeal intact for tenants and guests. The math is straightforward: a few hundred dollars in scheduled care today beats thousands in emergency repairs tomorrow.
Here is how the numbers typically break down:
- Routine service visit — minor repairs, cleaning, and lamp swaps usually run 3–8% of what you would pay for a full replacement. That is a remarkable margin.
- Emergency callouts — after-hours labor and rushed parts can multiply a small fix by 2–5x overnight. A loose wire that costs $150 to address on a Tuesday can easily hit $600 on a Saturday.
- Full system replacement — this runs 100% of capital cost plus significant disruption to tenants, guests, and landscape access.
I have seen this play out more times than I care to count. A retail center in our portfolio ignored a single flickering fixture for months. Eventually, loose wiring tripped the transformer and took down an entire zone over a holiday weekend. The emergency contractor charged overtime and expedited parts on a Sunday. The total bill equaled roughly half the cost of a planned, phased replacement — and the property still had dark parking areas during peak shopping hours.
Property managers consistently report the same pattern: when routine checks are skipped, reactive spending runs 20–40% higher than what was originally budgeted for maintenance. That gap is almost entirely preventable.
Preventive maintenance turns unpredictable high-cost events into predictable, budgetable line items
Maintenance Cost vs Replacement Cost at a Glance
The table below illustrates the cost difference between addressing issues early and waiting for failure. Think of it as a financial case for staying ahead of the curve.
| Expense Type | Typical Range | Average | Why It Matters |
|---|---|---|---|
| Routine Service Visit | $75–$250 | $150 | Small fixes, cleaning, scheduling |
| Targeted Repairs | $150–$900 | $450 | Parts and focused labor |
| Transformer Replacement | $600–$2,500 | $1,400 | Averted by early wiring fixes |
| Full System Replacement | $8,000–$60,000 | $28,000 | Major capital outlay |
The takeaway is simple: catching a failing connection or corroded socket during a $150 service visit avoids the cascading failures that lead to $1,400 transformer replacements or, worse, a $28,000 system overhaul.
Practical Tips That Actually Work
A few habits that make a measurable difference in the field:
- Bundle lighting with landscape contracts. Combining services reduces mobilization fees significantly. When the irrigation or grounds crew is already on site, adding a lighting check is marginal cost.
- Log photos and serial numbers. This speeds warranty claims and gives your vendor clear documentation. A simple spreadsheet with fixture locations, install dates, and serials pays for itself the first time a warranty claim comes up.
- Coordinate with irrigation audits. Overspray from sprinklers is one of the most common causes of fixture corrosion and electrical shorts. If your irrigation audit reveals misaligned heads near lighting, fix both at the same time.
- Schedule checks before peak seasons. Late spring and early fall are ideal — before heavy summer use and before winter moisture sets in.
For a broader homeowner perspective and practical care tips, this guide on garden lighting is useful.
The bottom line: landscape lighting is an asset that pays dividends when maintained and hemorrhages cash when neglected. A modest, consistent maintenance budget protects your original investment far better than reacting to failures after they happen.
Building a Routine Inspection Schedule That Actually Works
I've seen too many maintenance schedules fall apart because they treat every corner of a property the same. The real secret to a plan that sticks is to stop thinking of the site as one big project. Instead, map it out into priority zones. High-traffic areas like retail entrances, hospitality drives, and HOA common areas are in one bucket; low-traffic service yards are in another. This approach immediately makes your efforts more realistic and your results measurable.
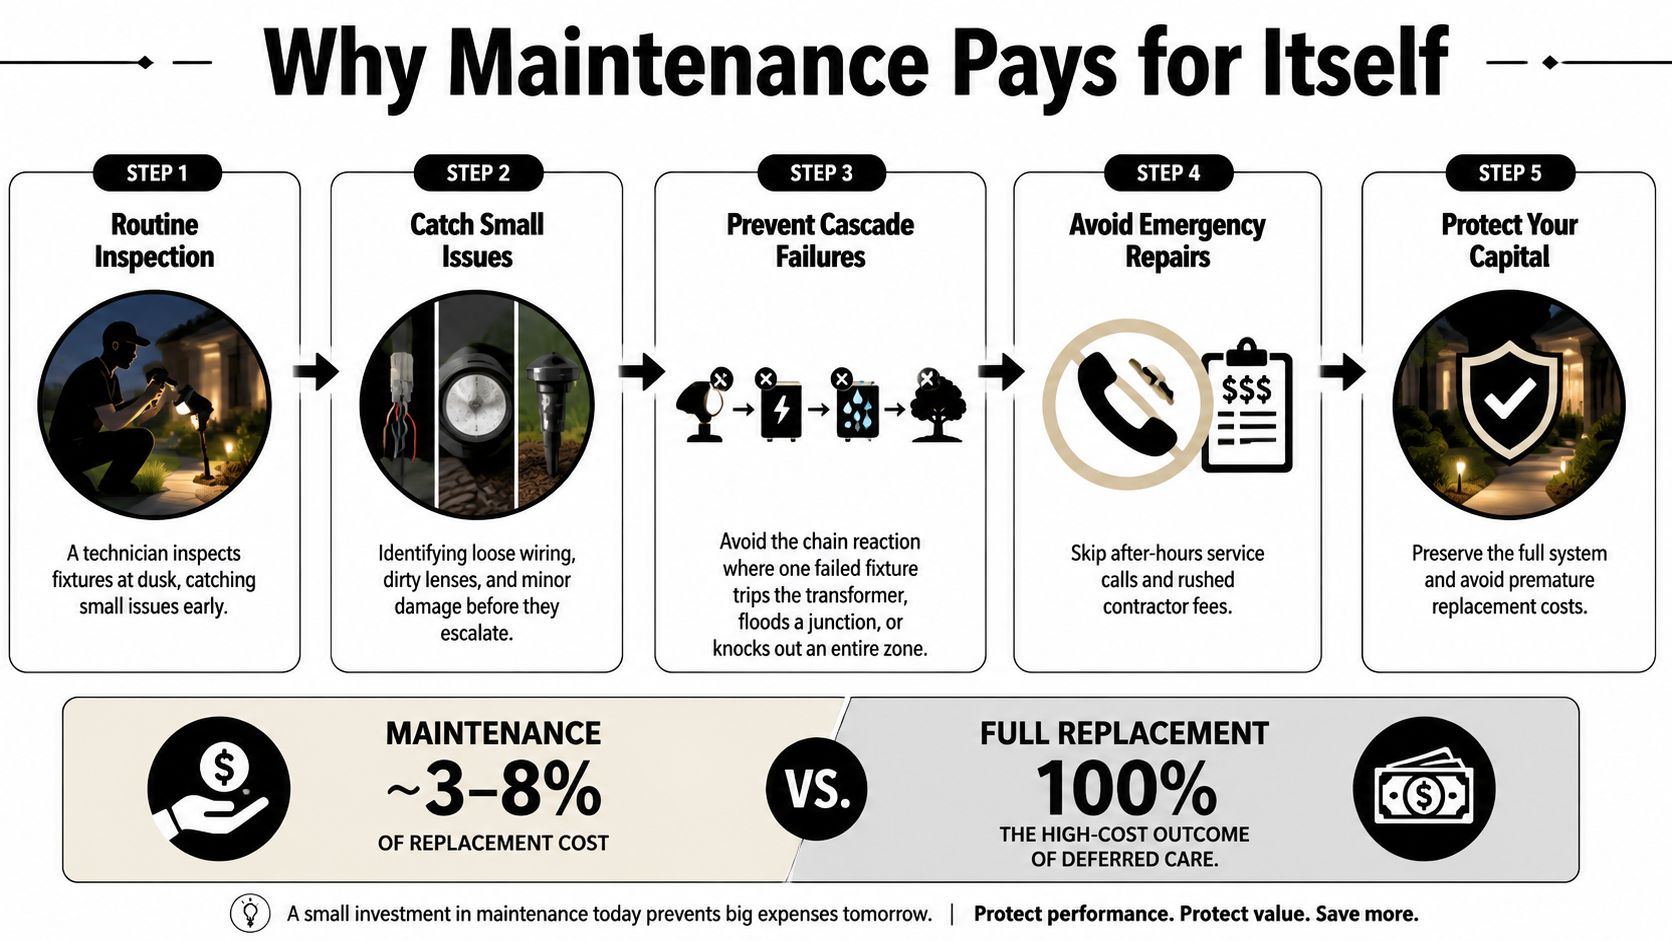
As this visual shows, consistent maintenance isn't just a task—it's capital protection. Spending a small fraction on upkeep, typically ~3–8% of the system's value, is far smarter than facing a full replacement bill down the road.
From Quick Passes to Deep Dives
Start with quick walk-throughs at dusk and dawn. These are the only times you'll truly see how the lighting performs—catching weird beam angles, unexpected glare, or other artifacts that are invisible in broad daylight. A simple 15–20 minute pass through your priority zones is all it takes to spot dirty lenses, misaligned fixtures, or burned-out lamps.
From there, build in monthly quick checks that your grounds team can knock out in under an hour. Arm them with a simple, one-page checklist. We're not talking about a full diagnostic here, just the basics: Is the fixture aimed correctly? Is the lens clean? Is any wiring exposed? Is an irrigation head spraying directly on it? Keep it simple: note the fixture ID, snap a photo, and flag it for action.
A few things make this process incredibly effective:
- A shared spreadsheet: Track zones, fixture IDs, service dates, and next steps. A linked photo of the problem is worth a thousand words.
- Fixture tags: Use durable labels and a map overlay. This way, even a new team member knows exactly which unit needs attention.
- Clear roles: Train your groundskeepers on what to look for, but make it clear that any electrical or buried wire issues must be flagged for licensed technicians.
The Annual System Health Check
Once a year, it's time for a deep-dive review. This is when you test your transformers, measure for voltage drops across long runs, inspect buried splices, and proactively swap out aging drivers before they fail. We find it’s best to schedule this in the spring or fall, when technicians aren't swamped with peak-season calls.
A short monthly check prevents cascade failures that lead to expensive emergency calls.
For example, we've learned that retail entrances need a quick check almost biweekly during the busy holiday season. In contrast, most HOA common areas are perfectly fine with monthly inspections and some extra prep before winter sets in.
During a typical monthly visit, your team should be focused on verifying all high-visibility lights are on, photographing any issues with a fixture ID, noting conflicts with sprinklers or overgrown landscaping, and escalating anything that looks like an electrical problem to a pro.
For a closer look at how technology can help manage these moving parts, check out our guide on how landscape scheduling software improves maintenance routines.
Dirty lenses and overgrown shrubs are usually the simplest, cheapest reasons your lighting loses its punch. It happens slowly, but the impact on your property's curb appeal is immediate.
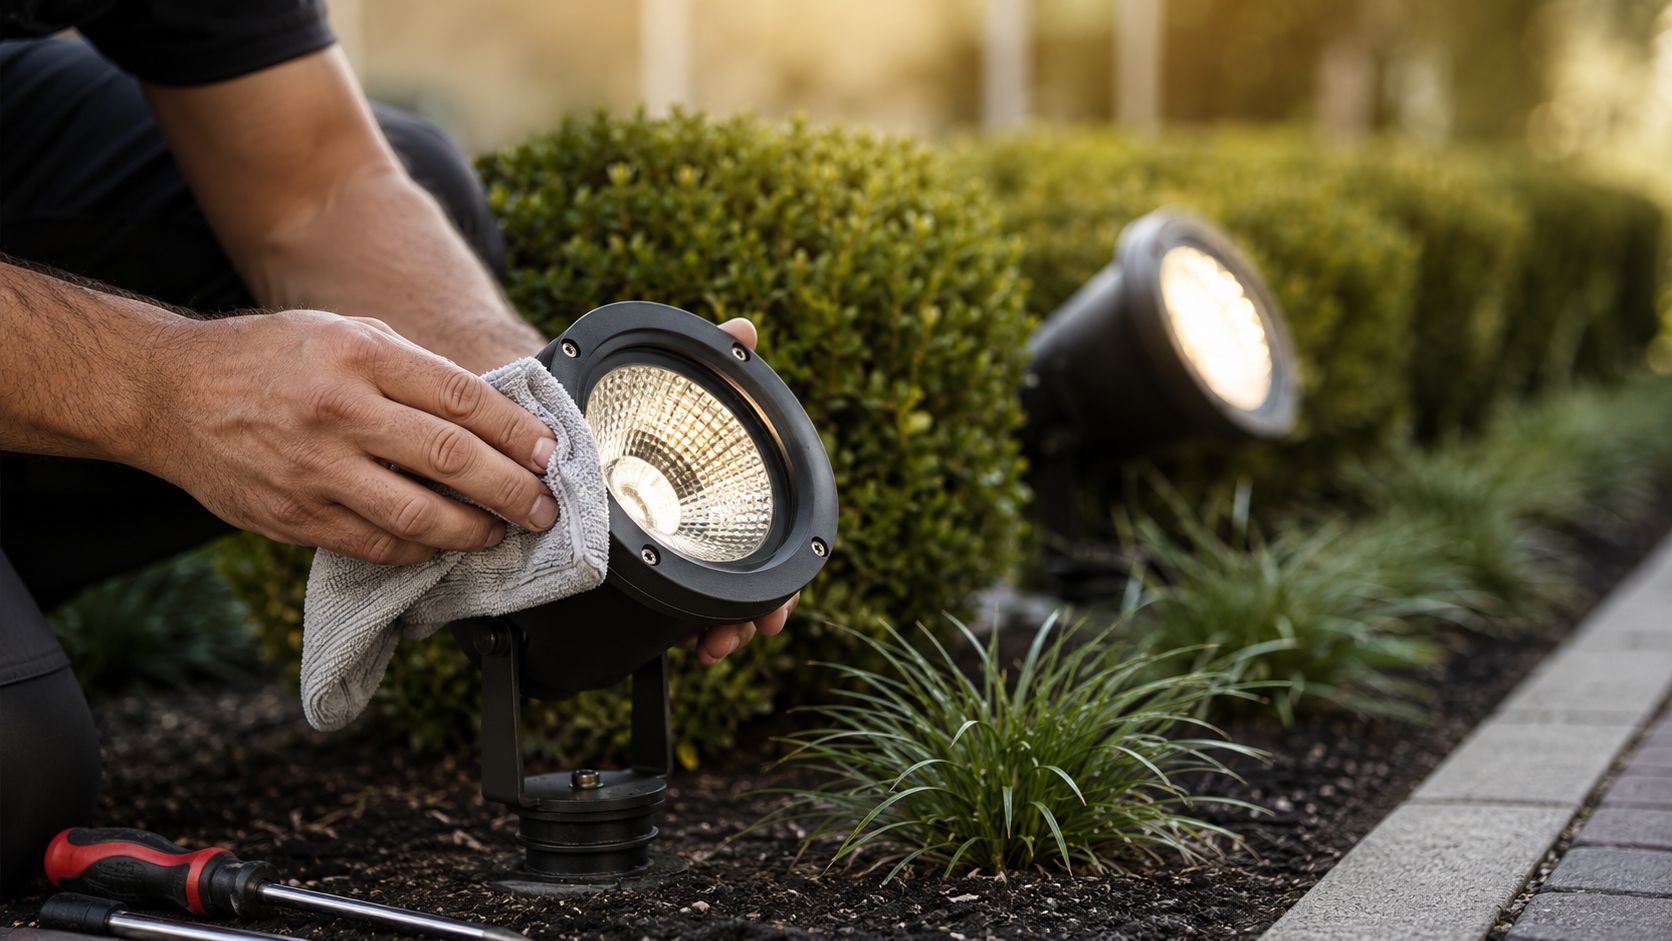
You want a cleaning routine that protects the fixture's coatings and seals. Grab a soft microfiber cloth, some mild detergent, and distilled water to tackle mineral deposits. Stay away from abrasive pads or harsh solvents—they will scratch and strip the housings faster than you would think.
With sealed fixtures, stick to wiping down the exterior lens and junctions. If you spot fogging inside the lens, flag it for a technician. Opening sealed housings yourself tends to void warranties, so let the pros handle internal moisture during your annual system check.
Safe Cleaning Intervals And Methods
- Weekly to monthly quick lens wipes in high-visibility zones.
- Quarterly cleanings for most commercial beds, bumping it up during heavy pollen season.
- Annual deep clean and gasket inspection during your spring service.
Vegetation Coordination With Lighting
Shrubs have a sneaky habit of growing right into uplight beams over a single season. Instead of tying your trimming schedule to the mowing cycle, sync it up with your lighting plan. I saw a retail entrance completely lose its wayfinding impact once because the shrubs were trimmed a month off from the lighting check. Once they realigned the trimming with the lighting inspections, the sightlines were back within a week.
Consistent coordination between grounds crews and lighting techs preserves design intent and avoids recurring fixes
Practical Steps To Keep Beams Clear
- Map your fixtures to the specific plant species nearby and jot down their expected growth rates.
- Schedule your trims about a month before your peak season lighting reviews.
- After the crew does the trimming, do a dusk walk to double-check beam angles and shadowing.
Example Case Study
A local shopping center was trimming their shrubs every six weeks, but only reviewing the lighting quarterly. By shifting to a six-week lighting check around the entrances, they reduced blocked beams by 85% in a single season. Even better, it drastically cut down on repeat service calls.
Learn more about plant health integration with lighting in our piece on plant care Learn more about plant health care services in our article.
To develop an effective schedule that truly works for landscape lighting, consider drawing insights from comprehensive home care documents like protect your Flagstaff property with a seasonal.
Catching Electrical Failures Before They Cascade
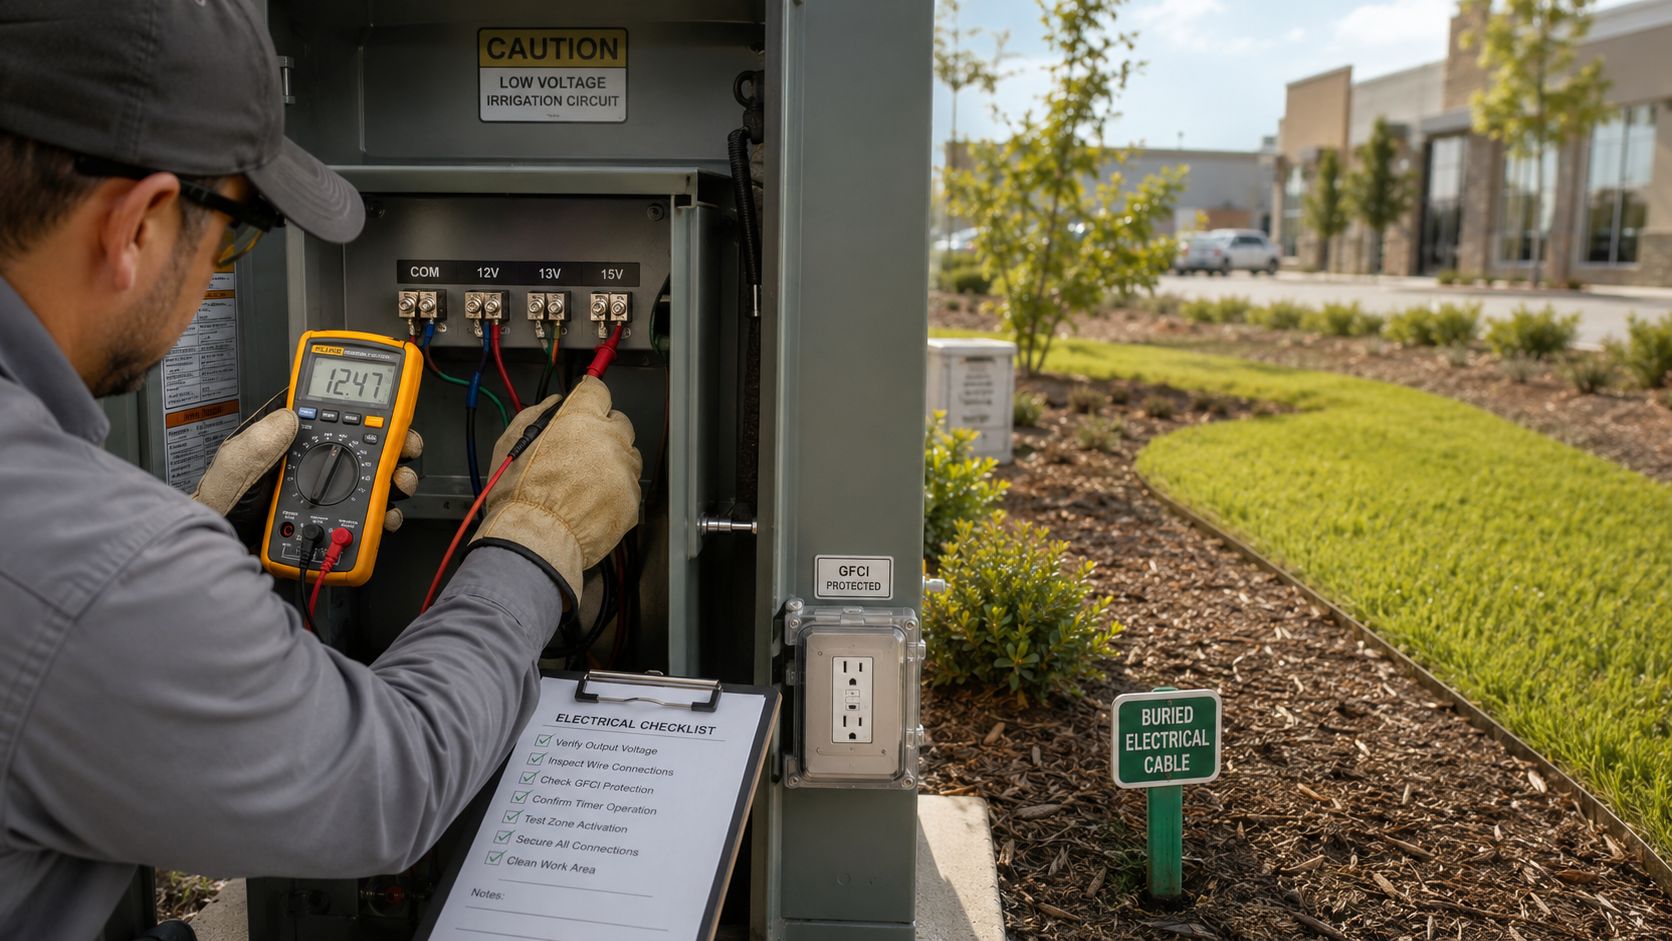
Electrical problems are the number one reason commercial landscape lighting goes dark. A quick stroll through the property isn't going to catch what is brewing underground or inside a panel. Technicians need a repeatable checklist that zeroes in on the failure points most likely to cascade into full-zone outages. For instance, loose transformer terminals that read hot under load often precede full-zone trips right during peak evening hours.
Start your inspections at the transformer cabinet. Open it up and look for corrosion on the terminals. Torque everything to the manufacturer's specs and test under load to check for voltage drop. You should also swap out the batteries in timers and photocells on a predictable schedule. Aging batteries are a surprisingly common culprit behind intermittent nighttime outages.
Check Wiring Depth and GFCI Protection
Measure the depth of your buried conductors at a few random spots to confirm they meet local code for your specific site usage. If you find exposed or shallow wiring near service drives or recent excavation work, fix it immediately. You also need to verify GFCI protection at upstream outlets. This is non-negotiable in most commercial settings.
Proper outlet protection reduces shock and equipment damage risks while significantly extending the life of your components.
- Inspect junction boxes for any signs of water ingress or failed gaskets
- Look for irrigation overspray patterns that might be pushing moisture into electrical enclosures
- Replace damaged grommets and reseal entries right away
Component Lifespan Planning for Commercial Lighting
Instead of reacting when something burns out, plan your replacements ahead of time. Tracking the typical service life for your bulbs, LED drivers, sensors, and timers lets you budget for swaps instead of getting hit with emergency invoices. For example, plan on replacing LED drivers every 6–10 years at high-use sites, and swap photocells every 3–5 years depending on their load.
| Component | Typical Lifespan | Planning Consideration |
|---|---|---|
| LED Drivers | 6–10 years | Budget for group replacements in high-use zones to avoid mixed lighting ages |
| Photocells | 3–5 years | Replace in batches to prevent staggered nighttime outages |
| Transformers | 10–15 years | Schedule load tests annually to catch internal wear early |
| Copper Wiring | 20+ years | Inspect insulation integrity every few years, especially in wet zones |
| LED Bulbs | 15–25 years | Track lumen depreciation; replace once output drops below usable levels |
| Timers and Controls | 5–8 years | Upgrade proactively to avoid obsolescence and software glitches |
Once you have a handle on those timelines, you can stay ahead of the curve. Record the install dates and serial numbers for every transformer and driver on the property. Forecast your replacements on a rolling 3-year budget cycle, and schedule load tests during your annual deep reviews.
Troubleshooting and Safety Tips
Grab a clamp meter to track down unexpected current draws, and use a thermal camera to spot hot terminals after the system has been running for 30 to 60 minutes. If you keep finding water intrusion despite using sealed boxes, it is time to call in an electrician for a permanent rerouting of the affected lines.
For practical outlet cover guidance in wetter climates, check out this helpful resource on outlet safety for Texas homes.
Want to make your ongoing maintenance even easier? Take a look at our guide on Landscape Lighting Design Ideas for design choices that simplify upkeep from the start.
Seasonal and Storm-Season Adjustments Your Crew Should Plan For
Spring is when hidden problems from winter finally reveal themselves. Pollen coats lenses, runoff pools around housings, and the moment your irrigation tech turns those systems back on, every weak seal gets tested. Start with a walkthrough of your most visible zones. Mark any fixture showing lens haze or cracked gaskets right then. That simple habit keeps minor moisture from turning into full interior fogging, which almost always means replacing the entire housing.
Coordinate with your irrigation team early in the season. Once water systems restart, do a paired check of your lighting and sprinklers in the same visit. If a retail plaza's pop-up heads are overspraying onto low fixtures, adjust the alignment on the spot and flag that fixture for a lens cleaning and reseal. This kind of coordination eliminates repeat trips and saves fixtures from mineral buildup that becomes permanent if ignored.
Pairing lighting inspections with irrigation startup is one of the highest-return habits a maintenance team can build.
Summer Storm Prep
High winds and heavy rain expose what routine visits miss. Uplight stakes bend, conduit seals fail, and low wiring runs become obvious the moment standing water shows up. Focus on these priorities before the first real storm window hits:
- Check anchor depth and tighten any loose stakes.
- Verify beam alignment after any recent trimming or minor storm contact.
- Reseal junction entries and torque transformer terminals, documenting the values.
That's your golden window. Once storms arrive, you're reacting instead of preventing.
When To Call A Professional
A good field crew knows when to pick up the phone. Consistent water intrusion inside housings, burned components, or voltage drop under load all warrant a licensed technician for a proper storm-damage assessment.
If you find consistent water intrusion, burned components, or voltage drop under load, call a licensed technician for a storm-damage assessment.
After a major storm, escalate when multiple fixtures fail simultaneously, GFCI trips won't reset, or junction boxes show sustained water inside. A pro can run load testing and thermal imaging to catch damage that isn't visible from the ground.
Winter Freeze and Moisture Management
As temperatures drop, condensation cycles become the enemy of low-voltage connections. Drain irrigation zones that sit near electrical enclosures. Confirm timer batteries and photocells are rated for the cold extremes your site actually experiences. These tasks pair naturally with autumn shutdowns, so track each one on a simple shared spreadsheet or job card.
Practical seasonal rhythm:
Start by walking the site with your irrigation tech to fix overspray. Focus on mount and seal reinforcement before storm season ramps up. Escalate to professional assessment if multiple failures appear after weather events. Wrap up each year with a pre-winter moisture purge and battery swap.
Following this rhythm keeps emergency calls rare, stretches the useful life of every fixture, and makes budgeting for landscape lighting maintenance something you can actually plan around rather than guess at. That predictability is what separates a well-run property from one that's constantly chasing breakdowns.
Budgeting, Staffing, and Knowing When to Call a Pro
Think of landscape lighting maintenance as a predictable line item, not a surprise capital expense. Build your annual budget around that mindset.
A good rule of thumb? Estimate routine visits at 3–8% of your system's replacement value. Then, set aside another 10–20% as a contingency fund for emergency call-outs—especially those weekend outages that always seem to happen at the worst time. That buffer keeps one bad Saturday from wrecking your entire year's budget and helps maintain solid relationships with your vendors.
Balancing in-house work with outside contractors saves money and avoids wasted trips. Your grounds crew can handle dusk inspections, cleaning lenses, and logging issues. Save the licensed electricians or low-voltage specialists for transformer work, repairing buried splices, and running thermal imaging diagnostics.
Staffing Levels and Role Definitions
Your team's responsibilities should be clearly divided. Here's how that typically breaks down:
- Grounds Crew Tasks — Monthly quick checks, photo documentation, basic cleaning, and flagging anything that looks electrically off.
- Lighting Technician Tasks — Fixture alignment, gasket inspections, swapping out multiple bulbs at once, and minor wiring fixes.
- Licensed Electrician Tasks — Transformer replacements, load testing, tracking down GFCI issues, and correcting any exposed wiring.
If you're seeing repeated water intrusion, unexplained voltage drops, or hotspots on thermal scans, don't wait. Call a licensed pro immediately.
Vendor Scopes and Contract Design
Bundling lighting maintenance into your broader landscape contract cuts down on mobilization fees and syncs things up nicely with irrigation and pruning schedules.
Spell out your expectations clearly. Define response times for after-hours failures, what the annual deep review should include, and your documentation standards—photo logs, fixture IDs, serial numbers, the works.
When to Call a Licensed Electrician
Some situations demand professional attention right away:
- Multiple fixtures go dark at once, or GFCIs refuse to reset.
- Transformer terminals show corrosion or run excessively hot under load.
- Buried conductor depth gets compromised after construction or freeze-thaw cycles.
Real-world example: A retail center slashed overtime costs by 45% after switching to bundled checks with their irrigation contractor. Another campus saved $1,400 on a transformer replacement simply because a loose terminal was caught during a spring load test.
Keep a rolling three-year replacement forecast in your budget. Train your team to document every fault, no matter how minor. Good documentation turns surprises into scheduled, affordable work—and that's how you keep landscape lighting maintenance predictable year after year.
Frequently Asked Questions About Landscape Lighting Maintenance
How often should inspections happen for different commercial classes?
Honestly, it comes down to visibility and risk. Class A offices and hospitality entries need weekly dusk checks during peak months—high-visibility failures hit tenant experience fast. Retail strips usually get by with biweekly walk-throughs and a monthly deep scan. Industrial yards and low-traffic service zones? Monthly checks plus an annual deep review typically suffice. The idea is simple: put your resources where failures actually cost you.
What routine tasks can grounds crews safely handle?
Grounds teams can take ownership of lens wipes, beam alignment at dusk, photo logging, and flagging irrigation conflicts. What they shouldn't touch: opening transformers, splicing buried conductors, or swapping out sealed fixture internals. A clean handoff keeps everyone safe—crews log electrical issues in the shared spreadsheet, technicians grab those flagged items, and electricians handle anything requiring broken seals or panel work.
- Weekly to monthly lens wipes in high-visibility zones using microfiber and distilled water
- Monthly photo-log updates for fixture IDs and locations
- Immediate flagging of exposed wiring or moisture inside lenses
Train crews to spot electrical red flags—burned sockets, repeated GFCI trips, that sort of thing
How do you build a realistic annual maintenance budget?
Start with replacement-value math. Budget routine visits at 3–8% of system replacement value, then layer in a 10–20% contingency for emergencies. Split the budget across labor, consumables (gaskets, bulbs), and a replacement reserve for drivers and transformers. A rolling three-year forecast helps smooth out big-ticket items, and scheduling group replacements prevents a cascade of emergency calls.
What warning signs mean cleaning won't fix a fixture?
Watch for persistent internal fogging after a reseal, steady lumen drop beyond normal LED depreciation, and thermal hotspots during a 30–60 minute run test. Repeated moisture ingress or drivers cycling off under load? That's a technician call, not a lens wipe.
Practical next steps to act on these answers
Map your priority zones and assign inspection cadences accordingly. Get grounds crews trained on the one-page checklist and photo logging. Build your budget around a three-year replacement plan with that 10–20% contingency. And when something electrical looks off, escalate it to a licensed technician right away—don't wait.
For expert service and a maintenance program that fits your property, contact Prestonwood Commercial Landscape Services at https://prestonwoodlandscape.com