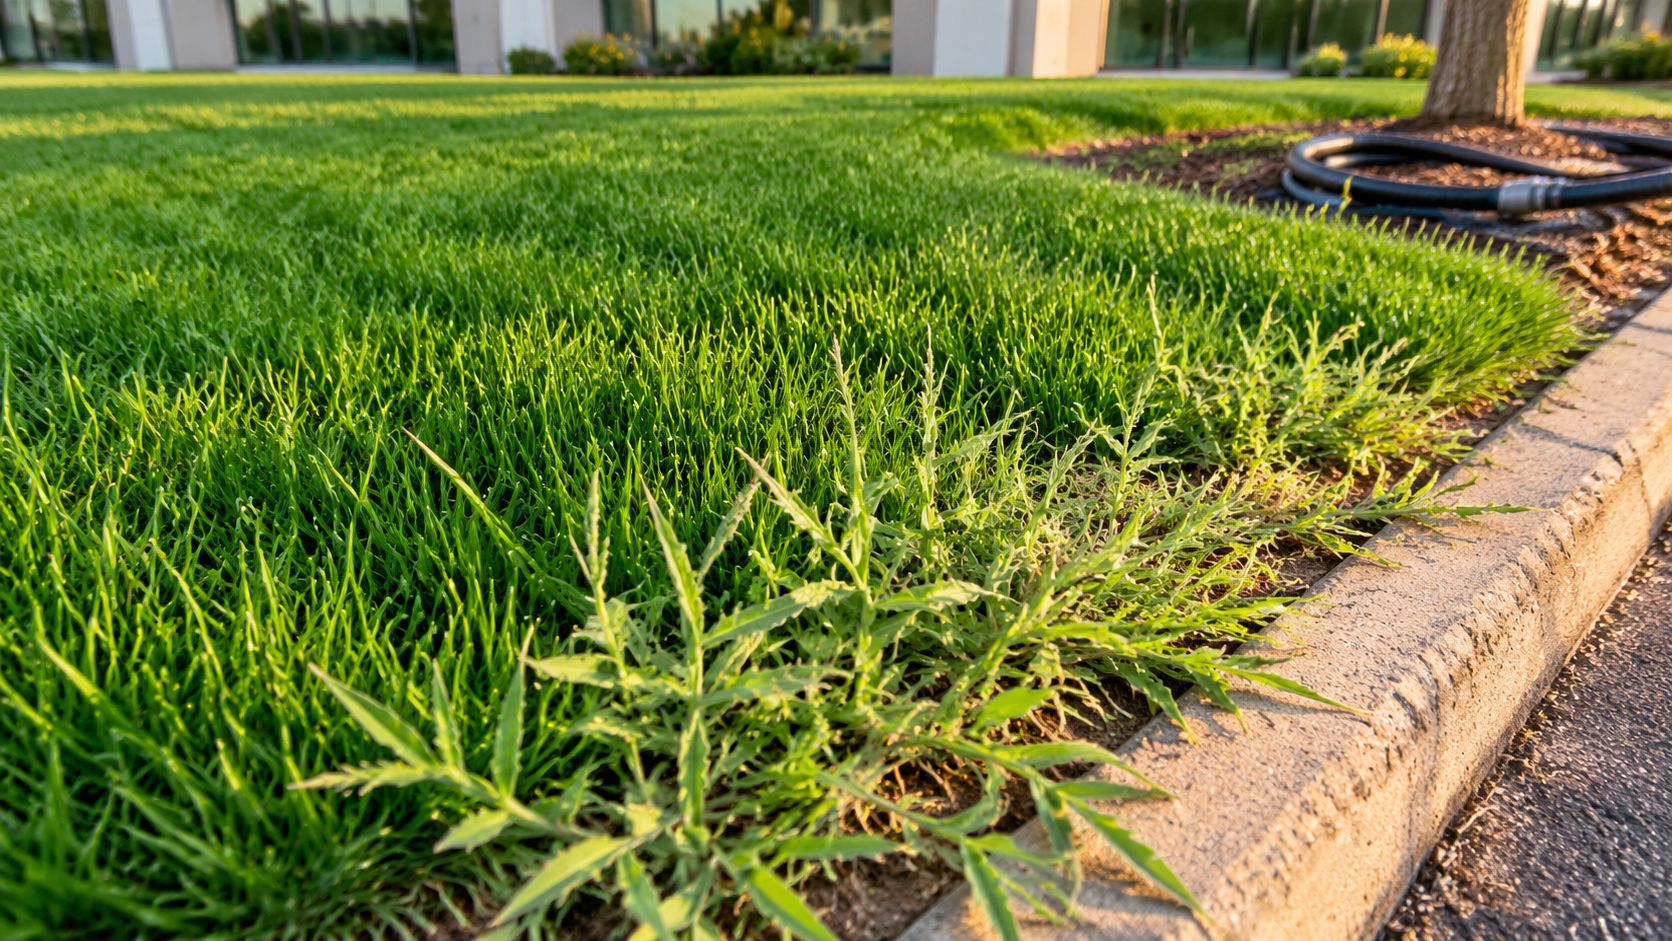
The water bill has climbed for three billing cycles. A turf area beside the loading dock stays soft after every irrigation run, yet there's no obvious break, standing water, or spray pattern to point at. The controller says the schedule is normal, while the meter suggests otherwise.
That's the commercial irrigation leak that consumes time and water. A buried lateral can seep below grade, a valve can fail to close completely, or a low-flow emitter leak can keep a zone drawing water without creating a visible puddle. A leak only 1/32 of an inch in diameter, about the thickness of a dime, can waste about 6,300 gallons per month, according to EPA WaterSense leak-education material.
For property managers, the difficult part isn't recognizing that something is wrong. It's deciding whether to patch, replace, redesign, or escalate before a crew spends hours excavating the wrong part of the site. The following field approach treats irrigation system leak repair as a diagnostic and asset-management task, not a blind digging exercise.
Table of Contents
- When a Commercial Irrigation System Is Telling You Something
- The Leak Detection Toolkit Property Managers Should Know
- How to Isolate a Leaking Zone and Bound the Repair Site
- Temporary Fixes Versus Permanent Repairs at Each Failure Point
- Running an Irrigation Audit That Actually Prioritizes Repairs
- When to Escalate and How to Prevent the Next Leak
- The Property Manager Leak Response Checklist
When a Commercial Irrigation System Is Telling You Something
A commercial irrigation system rarely fails in a convenient, obvious way. You'll often see a pattern first, not a broken component. A rising bill may indicate a mainline leak, a valve that never closes, or a controller program that has drifted away from current site conditions. A spongy turf strip can point to a lateral split, a leaking valve box, or water collecting above a buried failure.
Treat those observations as symptoms that need classification. The likely failure groups are:
- Mainline failure: Water escapes before the zone valve or at a tee, coupling, or meter assembly. This can continue outside scheduled irrigation windows if the system lacks effective isolation.
- Valve seepage: A solenoid valve may pass water when it should be closed, causing a low, persistent flow that's easy to miss on a large property.
- Lateral damage: A lateral line can split beneath turf, paving, mulch, or a planting bed. The zone may still operate, but coverage and pressure will change.
- Emitter migration: Drip tubing or emitters can loosen, shift, or discharge into soil pockets where the loss never reaches the surface.
Commercial properties mask these failures more effectively than small residential systems. Pipe runs are longer, burial depths vary, and a single controller may operate many zones across separate outdoor areas. A master valve can also hide the location of downstream losses by stopping flow during part of the day, while the remaining leak only appears when a particular zone energizes.
Field rule: A wet spot tells you where water is accumulating, not necessarily where the pipe failed.
Record the first symptoms with the date, operating zone, weather conditions, meter behavior, and area impact. That record becomes useful during vendor handoffs and budget reviews. Estimating platforms such as Exayard landscaping estimating software can help teams organize scope, labor, materials, and restoration requirements before approving repair work.
Water management also belongs in the broader property plan, particularly in regions where irrigation demand and performance are closely linked. This commercial landscaping water-management guidance provides useful context for connecting irrigation maintenance with long-term site operations.
The Leak Detection Toolkit Property Managers Should Know
After a storm or main break, a commercial meter may keep registering flow even when every surface looks dry. Start with the meter, not the shovel. Close irrigation valves manually, pause automatic programs, and record a static reading. Observe it through a reasonable test period. Movement confirms unexplained consumption, but it does not yet prove irrigation is the source.
Close the irrigation master valve if one is installed. If the meter stops, make irrigation the primary suspect. If it continues, check domestic fixtures, cooling equipment, makeup water, and other connected uses before approving excavation. This separation prevents a low-flow irrigation loss from sending a crew into the wrong part of the property.
Use pressure and flow to narrow the fault
Open one zone at a time and compare meter behavior with the site's normal operation. Connect a pressure gauge at an accessible hose bib or quick coupler downstream of the zone valve. Abnormal pressure decay, weak coverage, or flow that exceeds the zone's head and emitter demand warrants closer testing. A zone can waste water for weeks without creating a visible wet spot.
Pressure testing follows basic isolation. A contractor may test at 1.5 times working pressure when the pipe material, fittings, and procedure support it. Aging pipe does not justify applying that level casually. The test should expose a pressure-holding failure, not create another break.
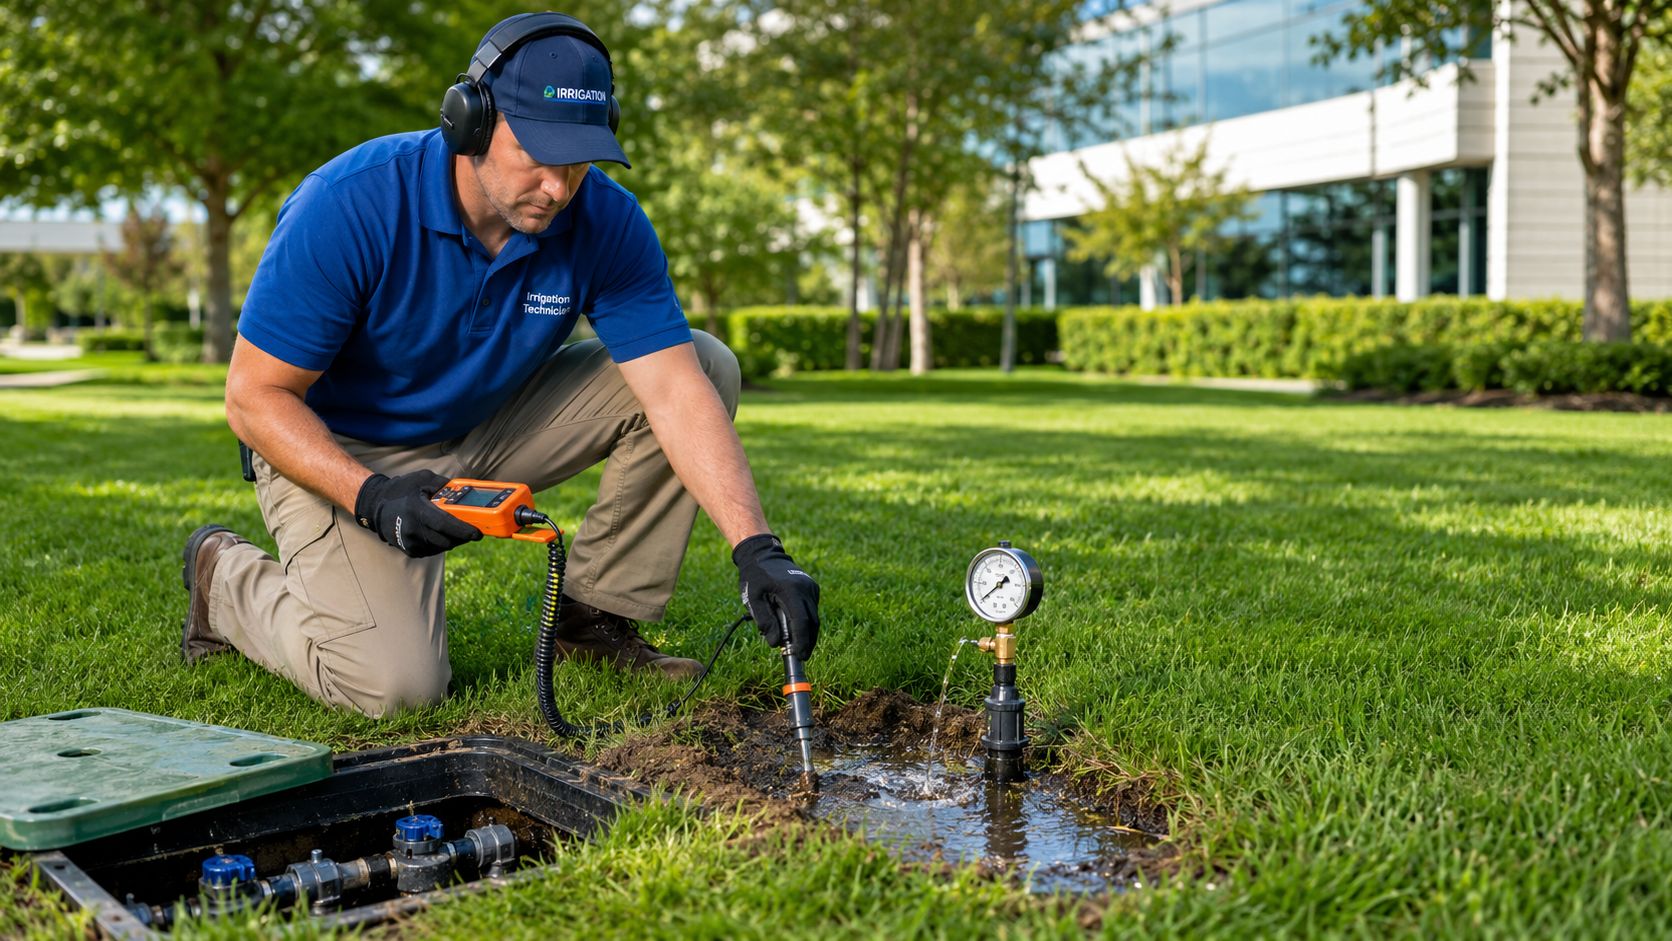
Acoustic equipment can locate turbulence, hissing, or escaping water near buried pipe. Soil-moisture probes help separate a continuously wet subsurface area from normal irrigation distribution, while thermal imaging can assist when soil conditions hide surface evidence. For homeowner-friendly background on symptoms and checks, use this detect underground leaks guide.
| Tool | What It Detects | Skill Required | Typical Cost |
|---|---|---|---|
| Water meter | Continuous or unexplained consumption | Low to moderate | Existing utility equipment |
| Isolation valves | Whether loss is upstream or downstream | Moderate | Existing site components |
| Pressure gauge | Pressure decay and zone imbalance | Moderate | Basic field equipment |
| Soil-moisture probe | Subsurface moisture concentration | Moderate | Specialty field tool |
| Acoustic locator | Escaping water near buried pipe | High | Contractor equipment |
| Thermal camera | Temperature variation associated with moisture | High | Contractor equipment |
Trained property staff can handle controller shutdown, meter observation, valve-box inspection, and basic pressure checks. Assign acoustic localization, critical-main pressure testing, backflow work, and testing near paving or dense utilities to a qualified irrigation contractor. Review soil-moisture sensor deployment guidance before buying sensors. Use them when repeated low-flow losses justify ongoing monitoring, not as a substitute for isolating the failed zone.
How to Isolate a Leaking Zone and Bound the Repair Site
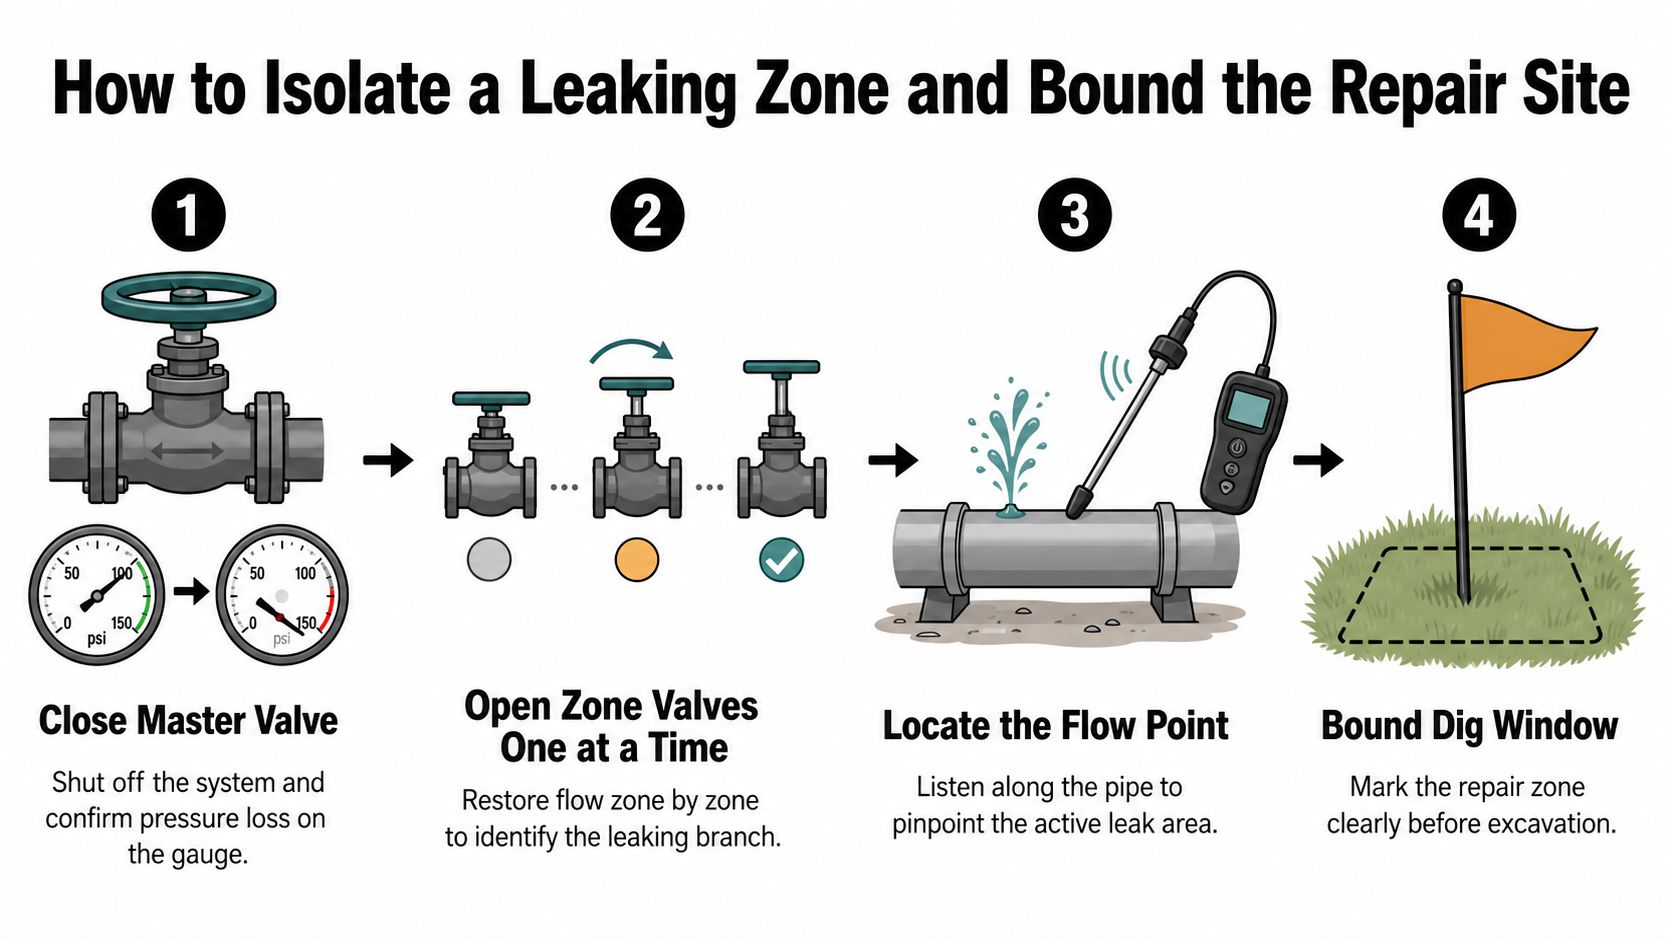
The objective is to create a small, defensible repair area before excavation begins. First, shut the master valve and verify the pressure response on a gauge. If pressure holds with the master closed, the irrigation leak may be downstream of that point. If it doesn't, stop treating the problem as a zone-level repair and investigate the mainline, meter assembly, or backflow section.
Work from the manifold outward
Energize one zone valve at a time. Watch the meter, observe pressure behavior, and note whether the zone reaches normal operating pressure. A zone that shows abnormal decay or unexplained flow becomes the working suspect. Shut it down and confirm that the signal disappears before moving to a more detailed test.
At the valve manifold, cap or isolate one lateral where the system layout allows it. Rerun the pressure test. If one side holds and the other still loses pressure, the failed section is in the losing branch. Continue splitting the zone only when the pipe arrangement and fittings make that safe and practical.
Use the valve box, as-built drawing, tracer wire, and surface indicators together. Don't rely on a drawing that hasn't been updated after property renovations. Probe carefully around likely alignments, listen for the strongest signal, and mark the suspected route with paint or flags.
Practical rule: Stop narrowing when the evidence gives you a bounded dig area. Repeatedly splitting a complex zone can cost more than bringing in acoustic location equipment.
A field pressure-variation method reported a leak-location error of 0.217 ± 0.038% in one downstream case, and successful cases were reported at below 2% of total pipeline length in the cited research on pressure-based leak localization. On a 23,247.6 m system, a 2% band is approximately ±465 m, which is useful for planning but too broad for a small commercial trench without additional field confirmation. The final goal is a practical 2 to 4 foot dig window, not a theoretical point on a map.
Before digging, confirm utility markings, account for electrical conduit and communications lines, and photograph the marked area. If the suspected line passes beneath a drive aisle, foundation edge, utility easement, or critical planting, escalate before breaking the surface.
Temporary Fixes Versus Permanent Repairs at Each Failure Point
A temporary repair is justified only when it controls water loss, protects the site, and buys time for a scheduled permanent correction. It isn't a success if the same failure returns during the next irrigation cycle or forces another restoration visit.
| Failure Point | Temporary Fix | Permanent Repair | Cost Range | When to Escalate |
|---|---|---|---|---|
| Solenoid valve | Flush debris and clean the diaphragm | Replace a damaged diaphragm, solenoid, or entire valve as needed | Varies by valve size, access, and restoration | Escalate when the seat is pitted, the valve repeats, or the zone won't shut off |
| Lateral poly line | Use an approved repair coupling when conditions permit | Cut out damaged material and install a properly supported replacement section | Varies by pipe diameter, fittings, and access | Escalate when failures repeat along the same run |
| PVC lateral | Temporary clamp only where appropriate and safe | Cut out the damaged section and solvent-weld compatible pipe and fittings | Varies by excavation and curing requirements | Escalate beneath paving or near other utilities |
| Drip tubing or emitter lateral | Replace an emitter or use a compatible barb repair | Replace the degraded tubing or redesign the branch | Varies by tubing length and planting density | Escalate when leaks reflect pressure or layout problems |
A stuck solenoid often responds to flushing and diaphragm cleaning, but that's a service action, not a cure for a worn or pitted valve seat. If the valve won't close reliably after cleaning, replace the failing component rather than leaving a slow leak active.
A compression fitting may be inexpensive, but the fitting itself isn't the decision. Inspect the pipe for ovaling, abrasion, brittle material, and movement. A coupling on sound tubing can be reasonable. A coupling installed into a deteriorating run merely relocates the next failure.
PVC demands a proper cut-out and solvent-welded repair with compatible materials, adequate alignment, and appropriate cure time. Don't bury a joint before it has passed a pressure hold test. For drip irrigation, replacing one emitter makes sense when the tube is healthy. Replacing an entire branch or redesigning the zone becomes more sensible when tubing has hardened, emitters are inconsistent, or pressure varies across the planting bed.
The two decision lenses are water-loss severity and repeat-failure risk. A slow drip on an isolated capped lateral may wait for a planned visit. A mainline tee discharging under pressure requires immediate isolation. Repair economics also depend on the buried asset and restoration scope. A California water-loss guidance model uses default average repair costs of $5,946 for a main leak and $2,330 for a lateral or service-line leak, as described in this water-loss repair-cost guidance. Those figures are benchmarks, not quotes for every site, but they illustrate why surface restoration and access can matter as much as the pipe repair.
Running an Irrigation Audit That Actually Prioritizes Repairs
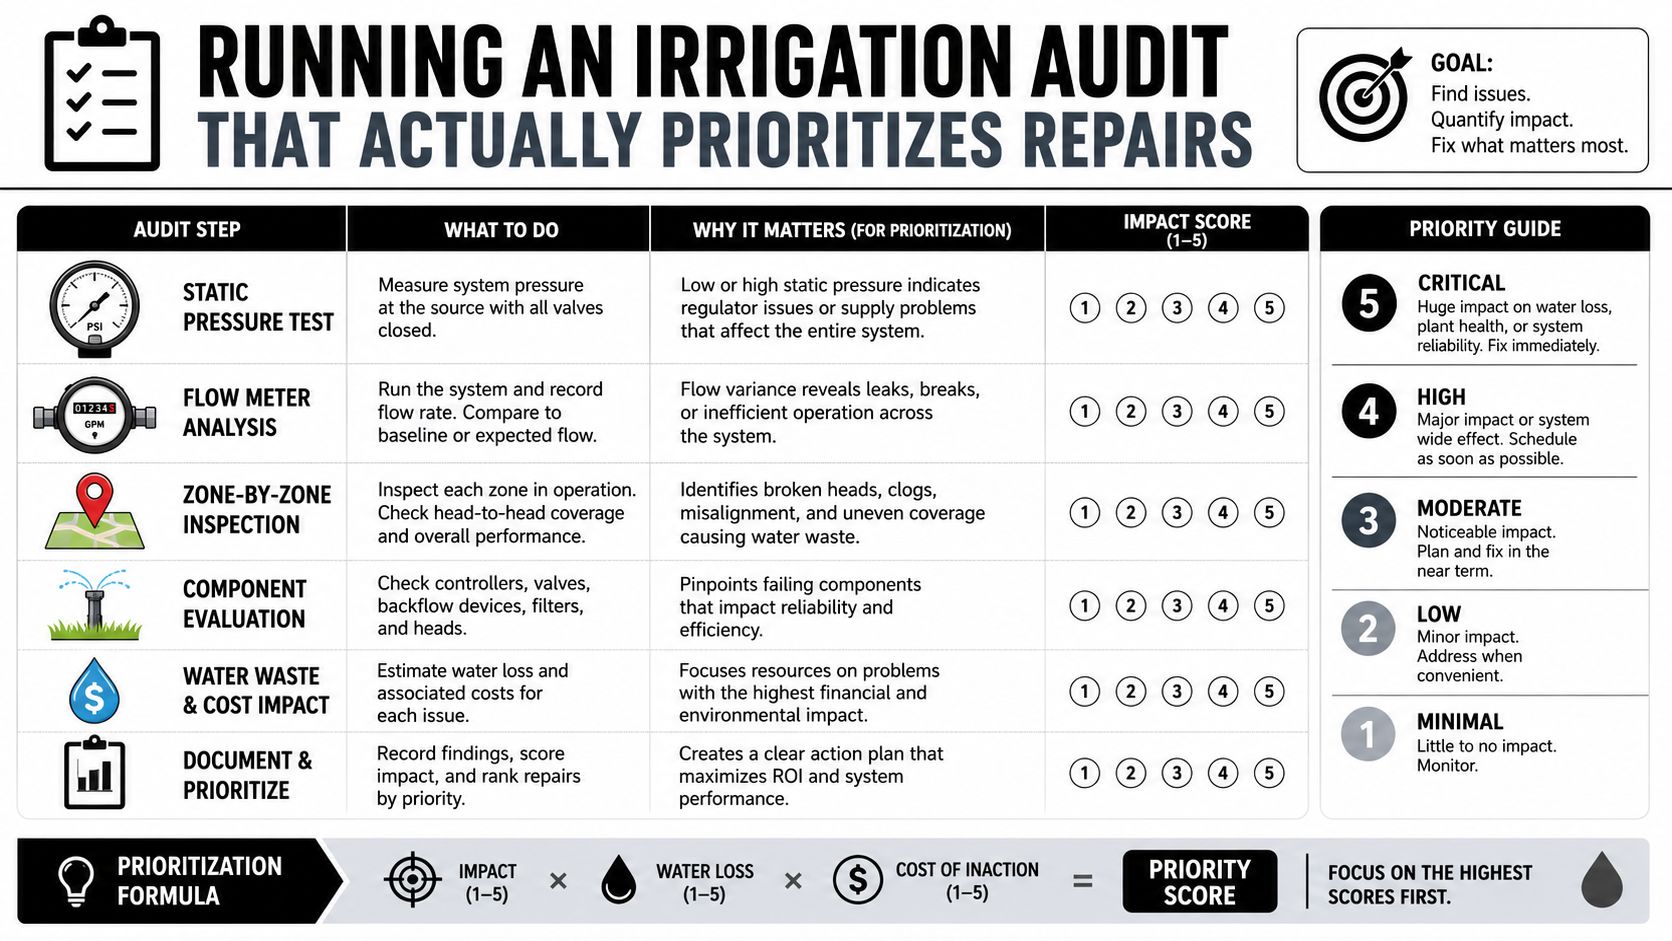
An audit should produce decisions, not a stack of observations. Start with the source and work outward, assigning each finding a priority based on water lost per cycle, safety exposure, environmental damage, and the probability of another failure.
Check the system in operating order
Static pressure verification comes first. Test at the source and at representative zones. Record the reading, time, operating condition, and whether the master valve is open. Pressure that varies sharply across zones can indicate regulation problems, undersized supply, obstruction, or leakage.
Valve-by-valve flow comparison follows. Compare actual flow with design information, prior maintenance records, or a known-good zone of similar construction. You're looking for variance, not a perfect theoretical match. A zone that draws more water than its documented equipment can support should receive a high-priority diagnostic flag.
Walk laterals and heads while operating. Look for sinkholes, persistent moisture, weak heads, misaligned spray, runoff, and planting areas that stay saturated. A concealed leak may show itself through plant growth or soil behavior before it appears as a puddle.
Review the controller program. Check seasonal adjustments, start times, runtimes, cycle-and-soak settings, rain shutoff devices, and zones changed during property renovations. A good pipe repair won't solve an outdated program that continues to overwater.
Test the backflow preventer through the appropriate qualified professional. Any discharge, failed test, or damaged assembly deserves prompt attention because it combines water loss with a protection and compliance concern.
Convert findings into a repair queue
Use a one-page matrix with columns for location, failure type, evidence, estimated loss, safety exposure, restoration requirement, recommended action, owner, and target date. Mark each item high, medium, or defer. High means active loss, significant damage, safety exposure, or a failure that can affect a large operating area. Medium means controlled loss or declining performance. Defer means the issue is documented and stable, but not yet worth interrupting higher-value work.
A practical audit should create a 90-day repair queue, with budget placeholders rather than false precision. The cheapest repair may offer the largest water saving when it stops a valve seep or eliminates a recurring controller error. Research summarized in the cited water-loss report found that dedicated irrigation meter programs achieved a 51% mean reduction in daily leak volume after proactive notification, while reductions reached 55% for single-family programs and 48% for multi-family programs. Those results reinforce a simple operational point: detection matters, but prompt notification and repair close the gap between finding a leak and stopping it.
For additional context on budgeting, review this commercial irrigation repair cost guide. The deliverable should remain useful after staff changes and vendor transitions, so attach photographs, valve identifiers, test readings, and closeout notes to every completed item.
When to Escalate and How to Prevent the Next Leak
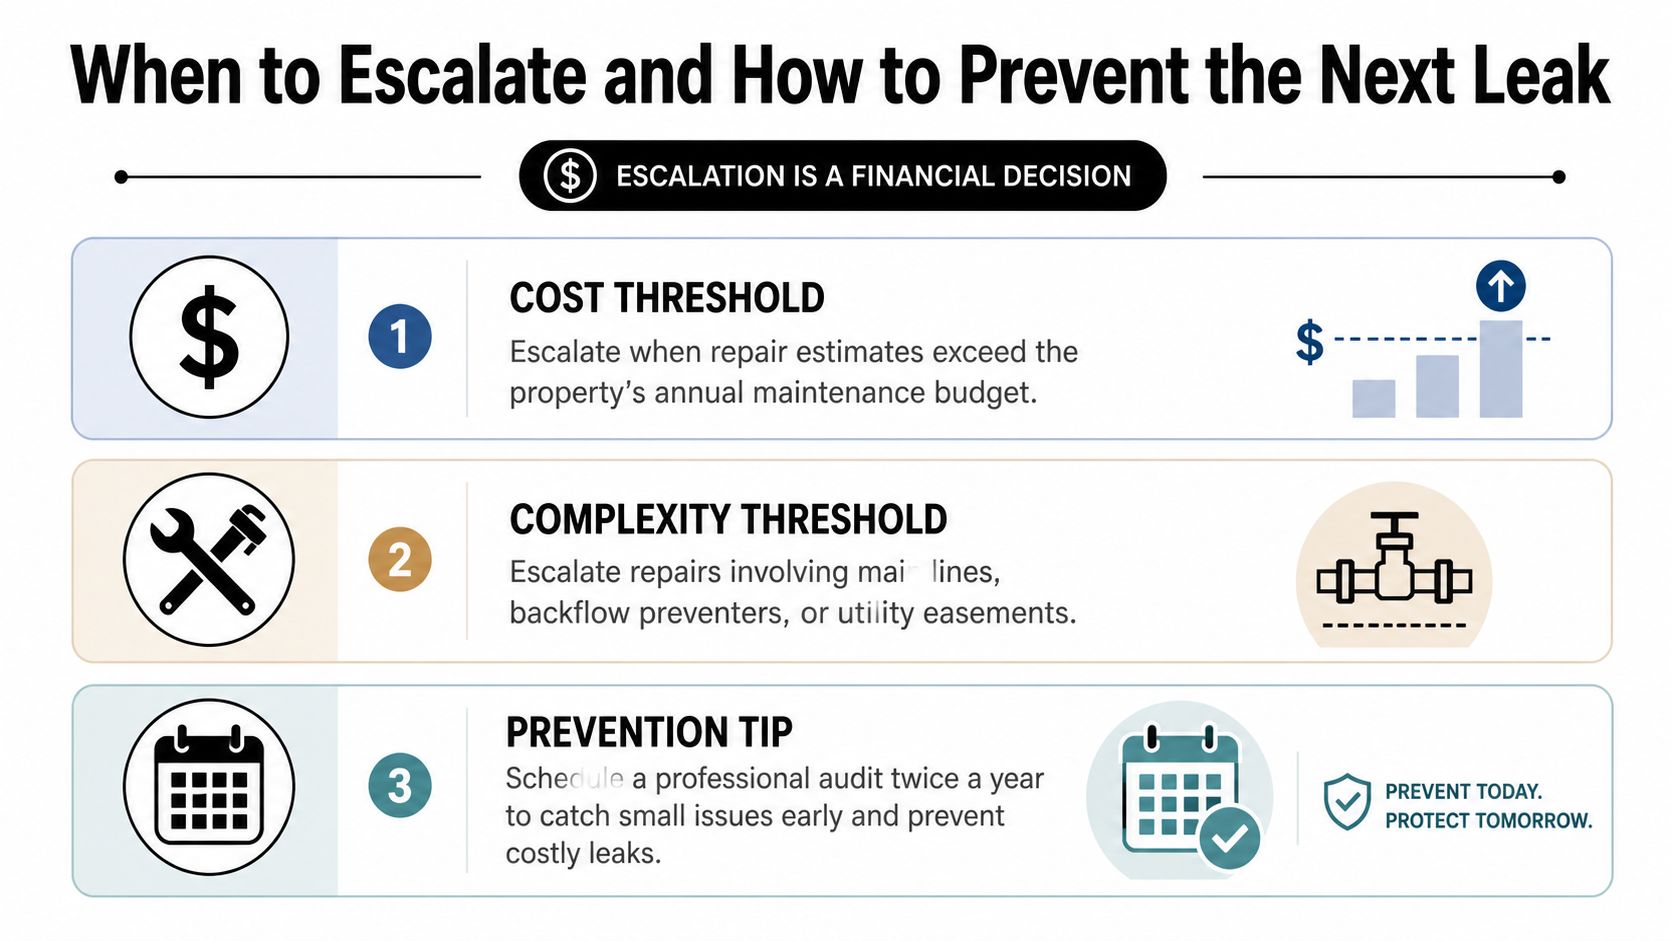
Escalation is a financial decision, not an admission of failure. Stop internal testing, excavation, or restoration when the remaining risk costs more than specialist support.
Send the issue to a qualified irrigation contractor or utility liaison when a mainline break is near the meter assembly, a backflow preventer discharges, the same zone fails repeatedly within 90 days, or suspected loss exceeds 10% of monthly billed volume. Pressure readings outside 20 to 80 psi also warrant professional review, especially when they affect a large zone, a backflow assembly, or a system with mixed pipe materials. These thresholds belong to the specified field decision framework, not a universal code requirement. Local standards and equipment manufacturer limits still control.
Spend on controls that solve the site's actual problem
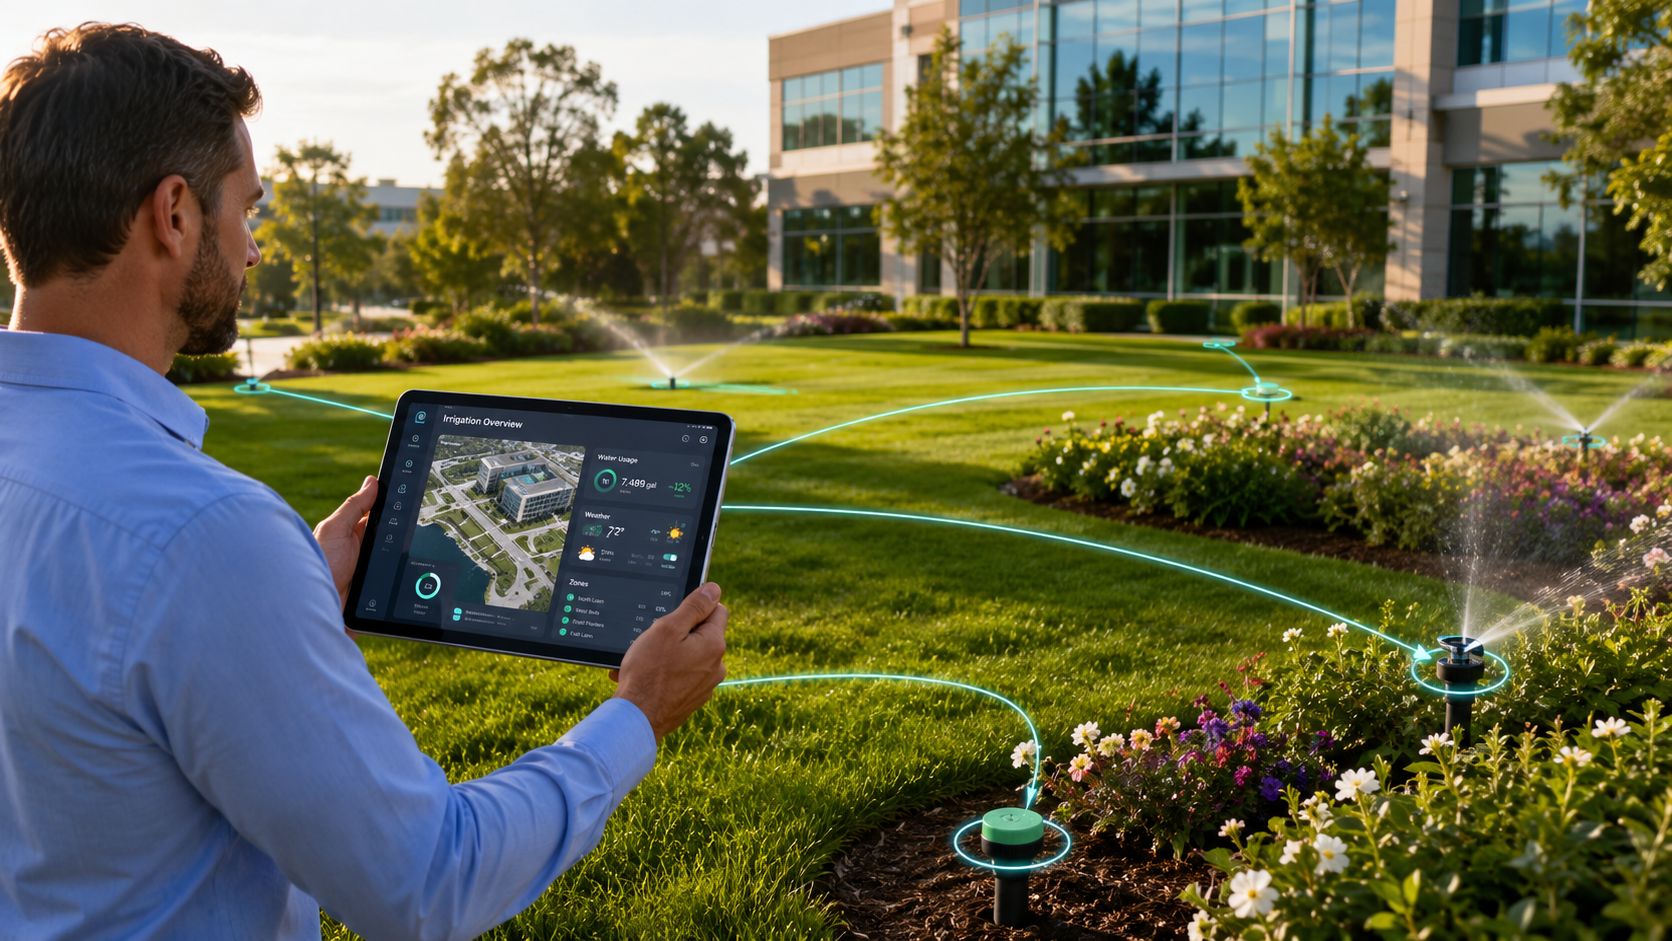
A smart flow sensor paired with a master valve can identify abnormal flow and shut down a zone before a minor failure becomes sustained loss. It earns its keep on properties with many zones, limited overnight supervision, or recurring low-flow leaks that appear on the meter before any wet spot appears.
Pressure-regulating valves protect downstream components where supply pressure surges or varies. They do not correct poor design, but they can reduce stress on valves, fittings, drip tubing, and spray components when existing pressure exceeds equipment requirements.
Zone redesign deserves consideration when one zone mixes head types, serves areas with different precipitation needs, or repeatedly creates dry and saturated pockets. Matched-precipitation rotors and clearer zone separation address the cause instead of replacing the same damaged fitting.
Escalation test: If the crew cannot explain the pressure behavior, repair boundary, and restoration plan, it is not ready to dig.
Emerging systems combine flow, pressure, and soil-moisture sensors for automatic irrigation leakage detection, as demonstrated by the DENORI irrigation monitoring project. The approach suits commercial properties where low-flow losses remain hidden between inspections. For facility planning, this property manager's guide to routine plumbing and irrigation maintenance provides a useful parallel for repeatable response procedures.
Set a maintenance rhythm that matches site risk. Perform quick irrigation and meter checks monthly, update audit findings quarterly, and complete a full-system review annually. Reprogram the controller after each significant site change, and document every repair so recurring failures can be traced to pressure, materials, installation, or zone design.
The Property Manager Leak Response Checklist
A leak response should close the loop from first meter reading to verified repair. The person who finds unexplained flow must leave enough evidence for approval, excavation, and the next audit.
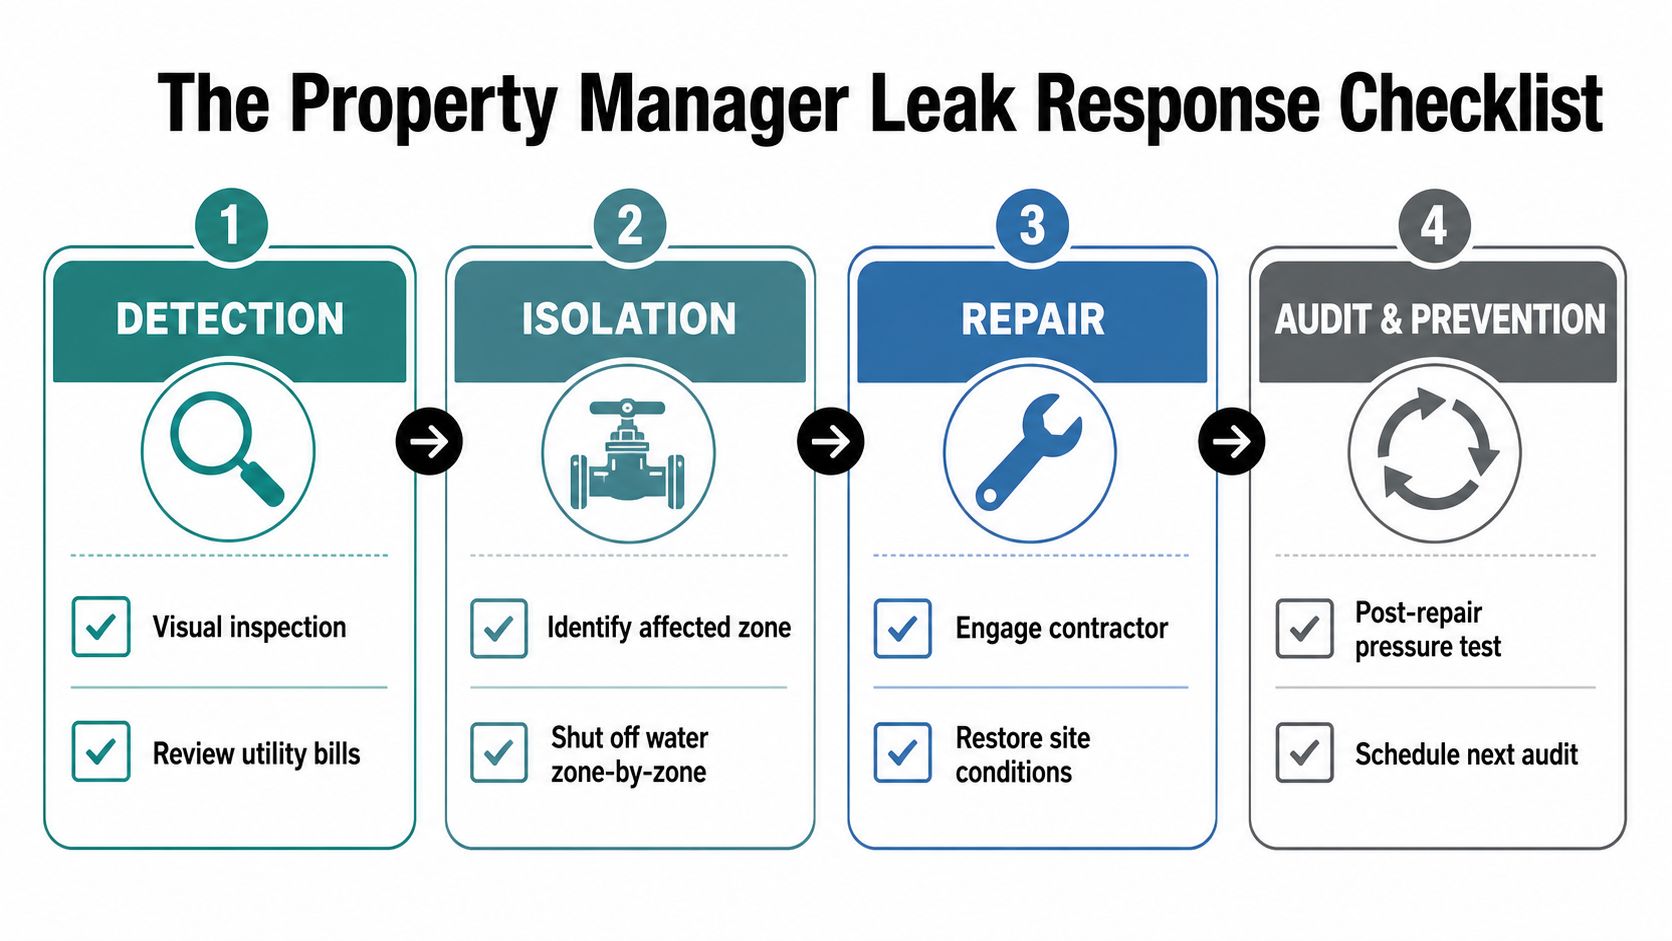
Verify
- Read the meter: Record the reading, irrigation status, time, and whether movement continues with valves closed.
- Check pressure: Note static and operating pressure at the source and suspected zone.
- Sweep the area: Photograph wet soil, sinkholes, weak heads, unusual growth, runoff, and damaged hardscape. A meter can show chronic low-flow loss even when the surface looks normal.
- Review the controller: Save the active program before changing runtimes or seasonal settings.
Move to isolation when use remains unexplained or a zone shows abnormal flow or pressure.
Isolate
- Close the master valve: Record the pressure response and any change in meter movement.
- Test zones individually: Log flow behavior, pressure decay, start time, and visible symptoms for each zone.
- Confirm acoustically or with sensors: Use contractor equipment when the surface provides no reliable signal.
- Mark the repair boundary: Record the valve box, pipe route, tracer-wire path, utility clearance, and excavation limits.
Do not start digging until the suspected zone and repair area are defined well enough to control restoration risk.
Repair
- Choose the repair level: Match cleaning, a temporary coupling, component replacement, lateral cut-out, tubing replacement, or zone redesign to the failure.
- Track materials and labor: Record parts, crew time, equipment, access restrictions, and surface restoration.
- Repressurize and retest: Confirm that the repaired section holds pressure and the zone operates normally.
- Photograph before backfill: Capture the failed component, replacement, depth, alignment, and nearby utilities.
A patch may restore service quickly, but repeated failures or an uncertain cause justify replacement, redesign, or specialist review.
Audit and prevent
- Update the asset record: Add the failure cause, repair date, cost, readings, and photographs.
- Decide on controls: Evaluate a flow sensor, master valve, pressure regulation, or zone redesign according to repeat risk.
- Schedule the next review: Keep monthly quick checks, quarterly audit updates, and an annual full-system review on the property calendar.
- Escalate unresolved patterns: Repeated failures, unexplained loss, backflow concerns, or uncertain pressure behavior require specialist review.
The goal is not to turn property managers into irrigation technicians. Each event should produce a controlled decision, a verified repair, and a record that keeps hidden loss from reaching the next billing cycle.
If chronic low-flow loss keeps appearing without a visible wet spot, contact Prestonwood to schedule an irrigation audit, prioritize repairs, and document a prevention plan for the site. Visit Prestonwood Commercial Landscape Services to request assistance.